How to DIY Ribbon from Fabric
Did you know that you can make ribbon from fabric? Ribbon wands and backdrops are a hot new trend for weddings. It's an easy way to add elegance to wedding decor. But, let's be honest, ribbon can get very expensive. It can also be really tricky to find ribbon to match your wedding color palette. In this DIY tutorial, I'll show you how to make ribbon out of fabric and dye it to match any color scheme!
This post includes some affiliate links for your convenience. This means that if you make a purchase, I earn a small commission at no added cost to you. For more information check out my privacy policy and disclosure.
Materials Used in This Project
- 100% Cotton Fabric (I used Kona Quilt Cotton Fabric that is prepared for dying)
- Rit All Purpose Liquid Dye
- Large Plastic Tote or Stainless Steel Sink
- Rubber Gloves
- Scissors
- Plastic Table Cloth or Garbage Bag
How to Prepare Fabric for DIY Ribbon
Lay the fabric on a flat surface. Using your cutting mat as a guide, make a small cut every two inches. If you want thinner or wider ribbon strips, adjust your measurements accordingly.

If you don't have a cutting mat, a yard stick, ruler, or measuring tape will work too! Now, carefully rip the fabric, starting where you made the small cut. I love this part! It is so satisfying. After you finish ripping the fabric into strips, remove the extra string from the sides of the strips. This will give the frayed edge look to the ribbon.
How to Dye the Fabric
Cover your work surface with a plastic tablecloth. Fill your plastic tote with three gallons of hot water. Add the dye to the water and mix well. Be sure to wear rubber gloves!
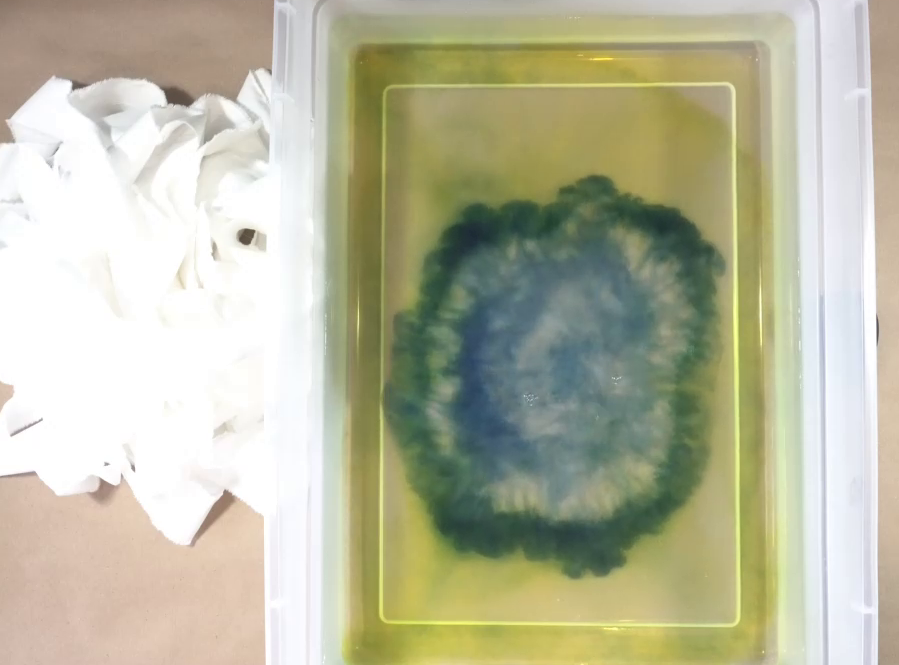
Rit has an extensive library of color formulas. I used one of the formulas to try and achieve a dusty blue. I ended up having to triple the formula to get the color I was looking for. After adding the dye to the hot water, carefully add the fabric strips.
After adding the dye to the hot water, carefully add the fabric strips. Using a spoon or tongs, stir the fabric in the large plastic tote for at least 10 minutes. Then let the fabric sit in the dye for at least 20 minutes.
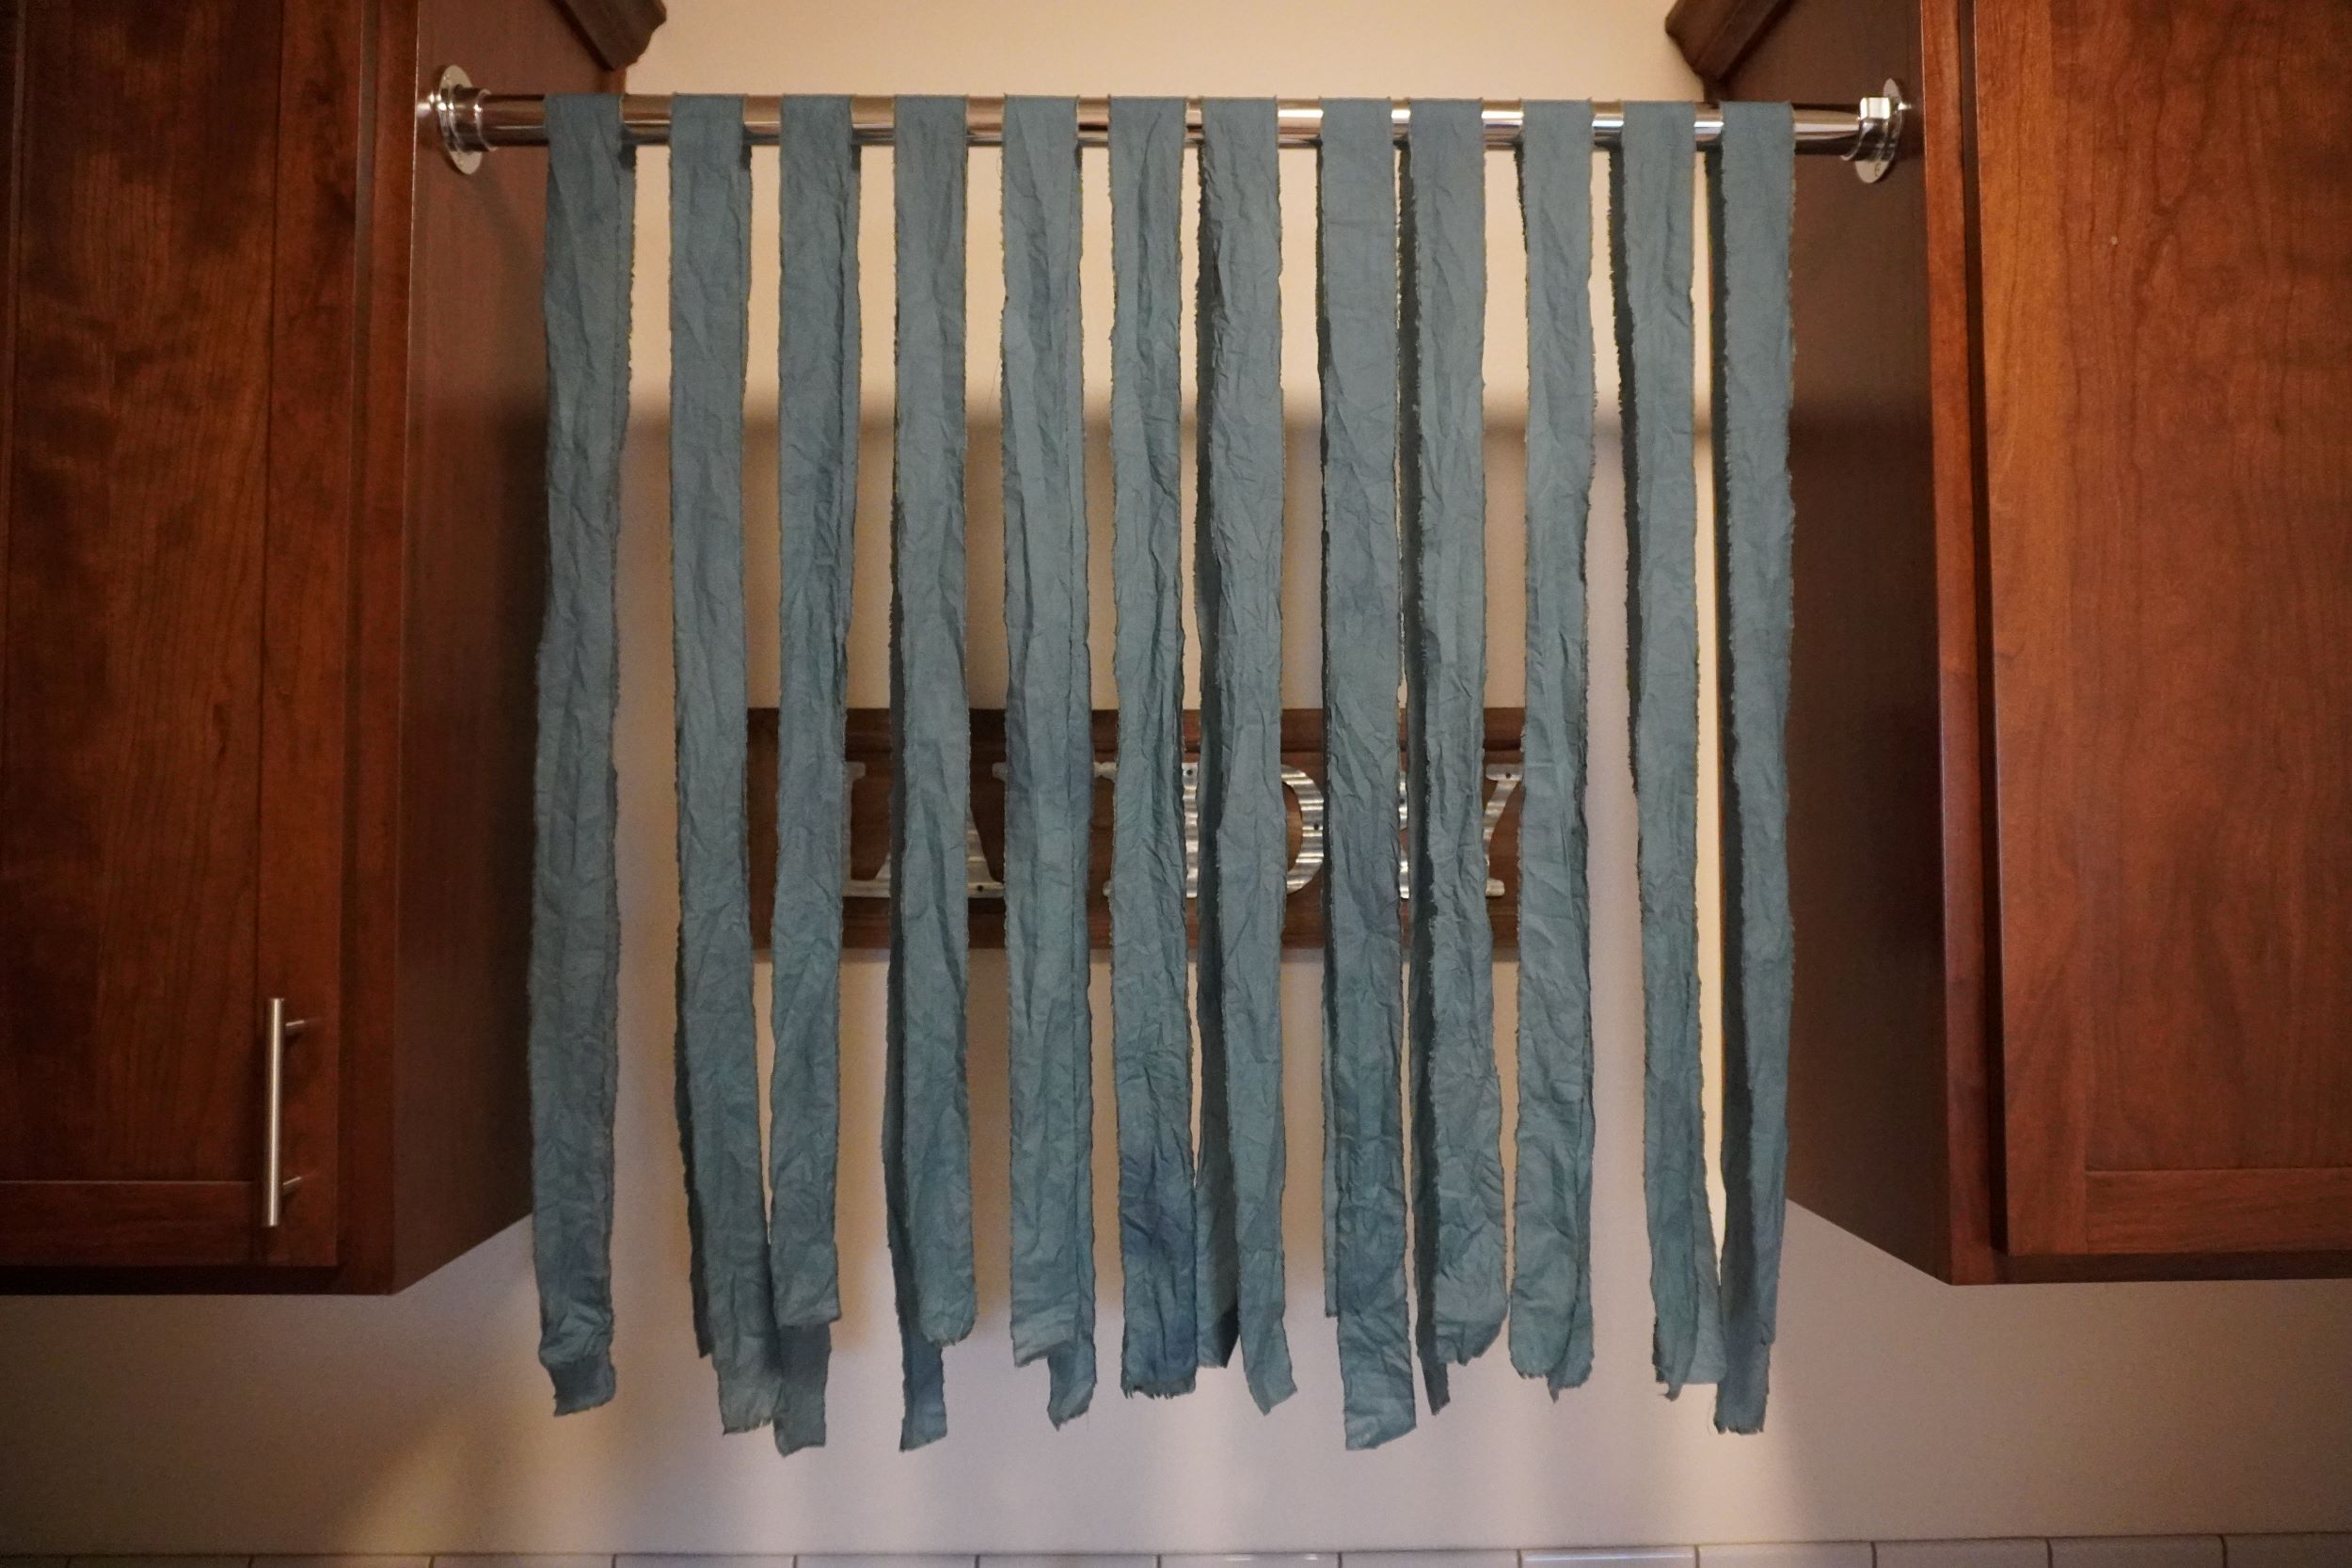
Once the fabric is dyed to your desired color, gently wring out the liquid and set aside on a covered surface.

Make sure to wear your rubber gloves so you don't dye your hands!
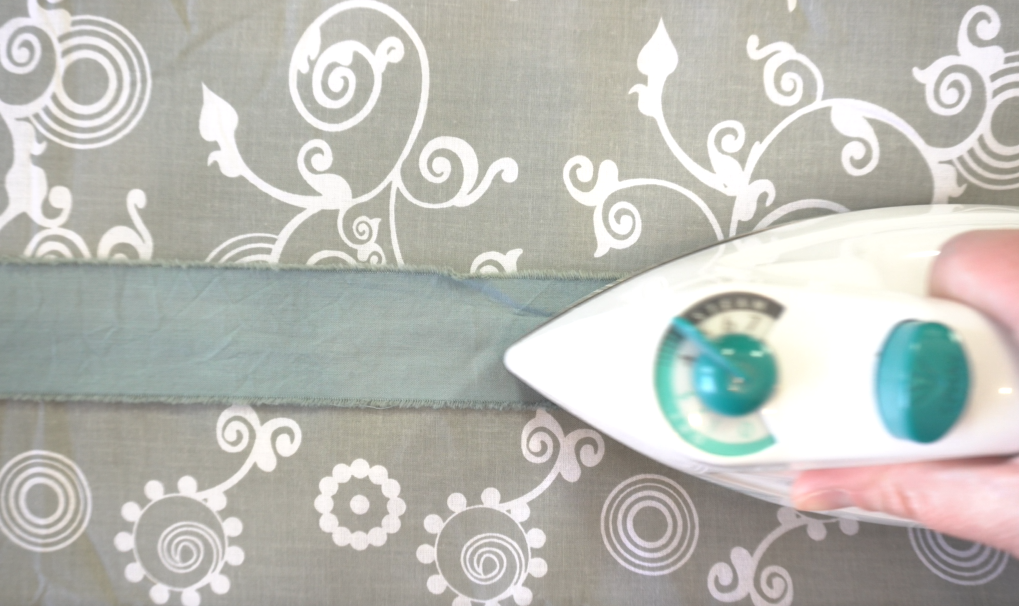
Carefully hang the fabric strips to dye. Cover the surface below the ribbon to protect against staining. When the fabric dries it will be a lighter color. After the ribbon has dried, use a warm iron to remove any wrinkles and soften the ribbon.
That's it! Use the ribbon to wrap around bridal party bouquets, create a backdrop, or tie around shepherd hooks.

How To Make Ribbon From Fabric
Have you ever wondered how to make ribbon from fabric? Ribbon wands and backdrops are a hot new trend for weddings. It's an easy way to add elegance to wedding decor. But, let's be honest, ribbon can get very expensive. It can also be really tricky to find ribbon to match your wedding color palette. In this DIY tutorial, I'll show you how to make ribbon out of fabric and dye it to match any color scheme!
Tools
- Scissors
- Large Plastic Tote or Stainless Steel Sink
- Rubber Gloves
- Kitchen Tongs
- Plastic Table Cloth or Garbage Bag
- Iron
Instructions
- CUT THE FABRIC - Lay the fabric on a flat surface and make a small cut every two inches. If you want thinner or wider ribbon strips, adjust your measurements accordingly. If you don't have a cutting mat, a yard stick, ruler, or measuring tape will work too!

- CAREFULLY RIP THE FABRIC, starting where you made the small cut. I love this part! It is so satisfying. After you finish ripping the fabric into strips, remove the extra string from the sides of the strips. This will give the frayed edge look to the ribbon.

- MIX THE COLOR - Cover your work surface with a plastic table cloth. Fill your plastic tote with three gallons of hot water. Add the dye to the water and mix well. Be sure to wear rubber gloves! Rit has an extensive library of color formulas. I used one of the formulas to try and achieve a dusty blue. I ended up having to triple the formula to get the color I was looking for.

- DYE THE FABRIC. After adding the dye to the hot water, carefully add the fabric strips. Using a spoon or tongs, stir the fabric in the large plastic tote for at least 10 minutes. Then let the fabric sit in the dye for at least 20 minutes.

- REMOVE THE FABRIC FROM THE DYE BATH. Once the fabric is dyed to your desired color, gently wring out the liquid and set aside on a covered surface. Make sure to wear your rubber loves so you don't dye your hands!

- DRY THE RIBBON. Carefully hang the fabric strips to dye. Cover the surface below the ribbon to protect against staining. When the fabric dries it will be a lighter color.
- IRON THE RIBBON. After the ribbon has dried, use a warm iron to remove any wrinkles and soften the ribbon.


Notes
Make thinner or wider ribbon by adjusting the spacing of your cuts in step one.