Simple DIY Rose Gold Table Numbers
Learn how to make rose gold table numbers for your wedding reception with this super easy tutorial! If you are planning to have a seating chart for your wedding reception, it's a good idea to number each table. There are many ways to incorporate table numbers into your wedding decor. Cricut's adhesive foil pairs well with white chalk paint to add some sparkle to any wedding color palette that includes rose gold.
Don't forget to download the free design file for this project in our Design File Library.
This post includes some affiliate links for your convenience. This means that if you make a purchase, I earn a small commission at no added cost to you. For more information check out my privacy policy and disclosure.
Materials Used in This Project
What Type of Wood Do You Use to Make Table Numbers?
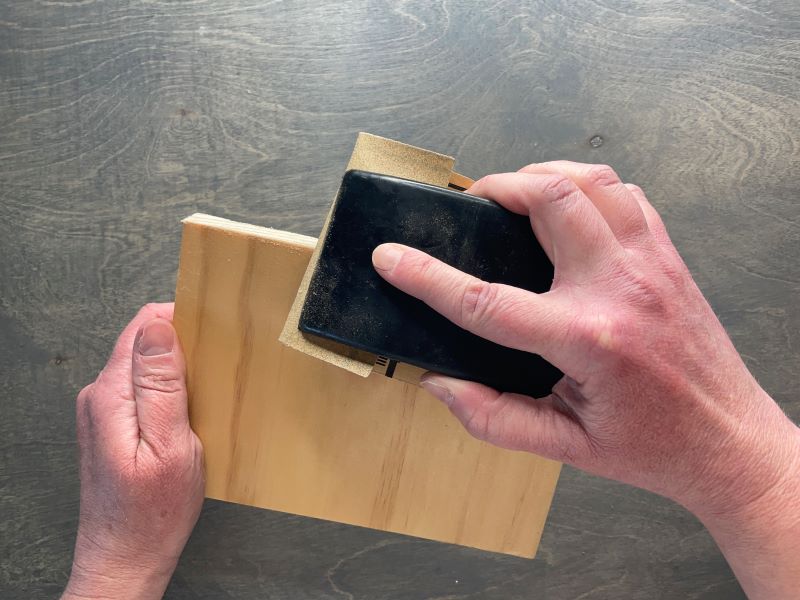
You can make wooden table number with any type of wood. For this tutorial, I am using a clean pine board that I picked up at my local hardware store. I've cut the board down to 5 inches by 7 inches. If you don't have a way to cut the wood at home, you can purchase pre-cut wood for the project on Etsy.
How Do I Prepare the Wood for Painting?
After cutting and sanding the wood you'll need to remove any remaining dust using a tack cloth. This ensures the wood is clean and free of debris. If this step is skipped there is good chance the paint and adhesive foil will not adhere to the board properly.

What is the Best Type of Paint to Use on Wedding Table Number Signs?
You can't go wrong with a chalk paint. In this project, I am using Folklore Home Decor Chalk paint. The reason I prefer to use this type of paint is that it does not have a gloss finish. It is perfect for wedding signs and decor because after the paint has dried you can sand around the edges for a worn or rustic touch. Chalk paint also has a thicker consistency and typically only requires one coat of paint -- which can save a ton of time!

How to Make Simple DIY Rose Gold Table Numbers

Simple DIY Rose Gold Table Numbers
In this tutorial, I am going to show you how to make beautiful rose gold table numbers for wedding reception tables.
Tools
- Cricut Maker or Explore
- Standard Grip Cutting Mat
- Paint Brush
- 100-150 Grit Sandpaper
- Palm Sander or Sanding Block
- Tack Cloth
Instructions
- Cut the wood board to 5 x 7 inches and sand the edges using a palm sander or handheld sanding block. Use 100-150 grit sand paper.

- Remove excess dust from the board using tack cloth. Don't skip this step otherwise your paint and vinyl will not stick to the board.
- Use your preferred paint brush to paint the wood board. I prefer chalk paint because it coats the board nicely which means I only need to paint one coat. It also dries really quickly.
- While the paint is drying, upload the table number design files to Cricut Design Space and start cutting the adhesive foil for the table numbers. If you don't have a password to the free design library, you can get one here. Otherwise, the design files can be found in our password protected Design File Library.

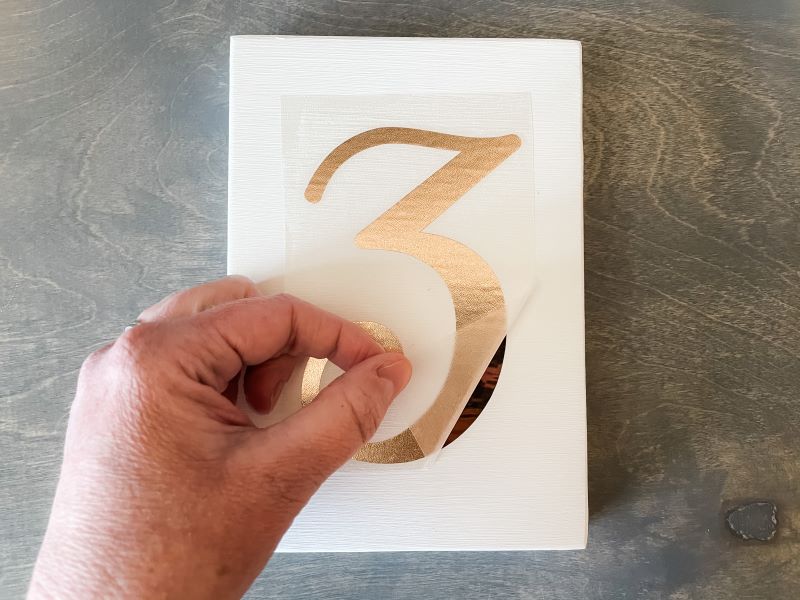
TIP: When preparing the table numbers in Cricut Design Space, draw a 5 x 7 inch white rectangle to represent the wood board and size the numbers to fit within the rectangle. Before you select the "make it" button and start cutting the vinyl hide or delete the rectangles. - Remove the negative space from the adhesive foil and apply transfer tape on top of the numbers. Since these numbers are fairly simple you won't need a weeding tool. You can just lift the corner of the adhesive foil or vinyl from the backing.
Use the scraping tool and burnish (rub) the adhesive foil and transfer tape. - Transfer the rose gold adhesive foil to the painted wood board.


Notes
If you'd like your table number signs to be double-sided make sure to cut two of each number.
To give the table number signs a worn look, gently sand the edges after the paint has dried. Make sure to remove any dust and debris using the tack cloth.