Easy Vellum Save The Dates
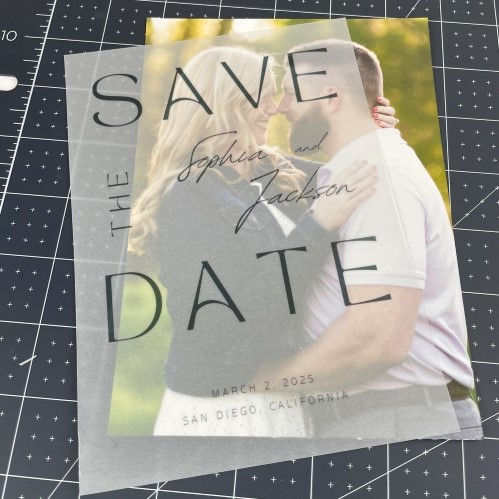
Vellum save the dates are a fun and thoughtful way to let your friends and family know of your upcoming nuptials. Just like in this tutorial, vellum is often used as an overlay for wedding invitations. In this post, I'll show you how to make vellum save the date cards two ways. First, by using a Cricut cutting machine. The second way will be by cutting the vellum by hand.
This post includes some affiliate links for your convenience. This means that if you make a purchase, I earn a small commission at no added cost to you. For more information check out my privacy policy and disclosure.

Where to Buy Vellum Paper for Invitations
Vellum can be found at most craft or office supply stores. We purchased the vinyl used in this project from Amazon. The print quality was great and it worked well with our Cricut Maker.
What Kind of Printer Can Print on Vellum Paper?
You can use both an inkjet and laser printer with vellum paper. There are benefits to each type of printer. If you plan to use a Cricut machine, you'll want to use an inkjet printer. This is so you can use the print then cut operation type. If not, a laser printer will do just fine. In fact, it can be more cost effective to use a laser printer. Especially if you only need black ink.
Can Gold Foil Be Added to Vellum Paper?
Absolutely! There are a number of different ways to add gold foil to vellum paper.
- One way is to print the save the date card or invitation using a laser printer. Then use a special laminating machine, like the Heidi Swapp Minc-Wheel Applicator, to transfer foil to the invitation. You can use a normal laminator, but the results are often inconsistent.
- A second way is to use the Cricut foil transfer kit. To use this method, you would change the operation type in Cricut Design Space to foil. This technique works best for fine print text. Read the Ultimate List of Single Line Fonts for Cricut to learn the best fonts to use with the foil transfer kit.
- Lastly, you can add foil vinyl to vellum paper to give invitations the look and feel of traditional gold foil.
In this tutorial, we are just going to print on the vellum save the dates. Let's get started!
How To Make Vellum Save The Dates
Use your Cricut to make these vellum save the date cards.
Materials
- Vellum Paper
- Photo Paper
- Eyelets
- Envelopes
Tools
Instructions
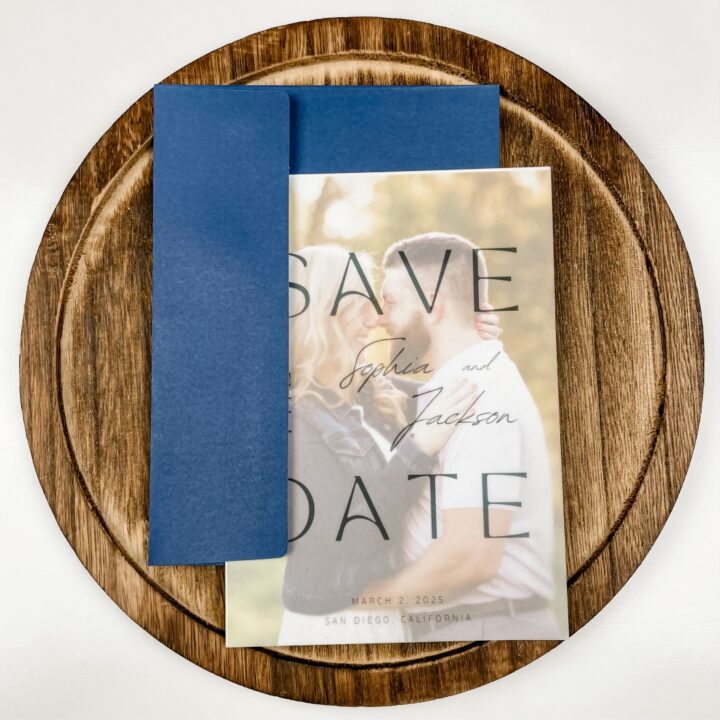
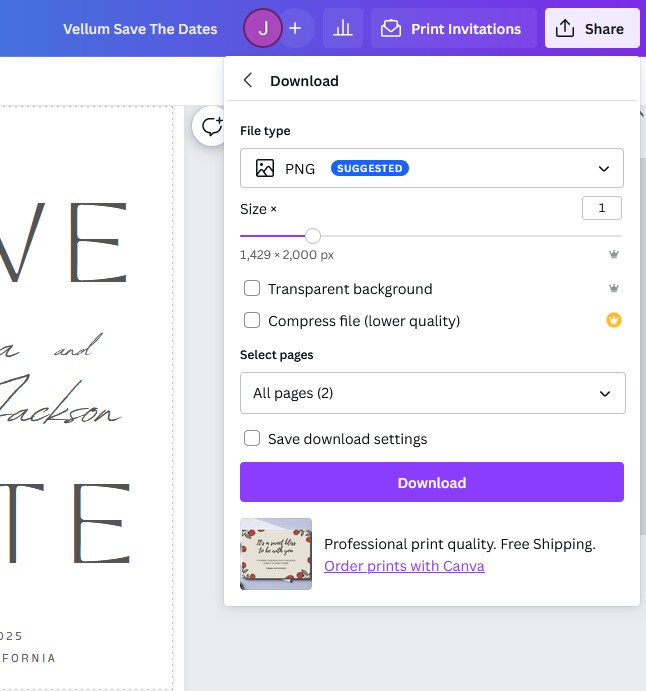
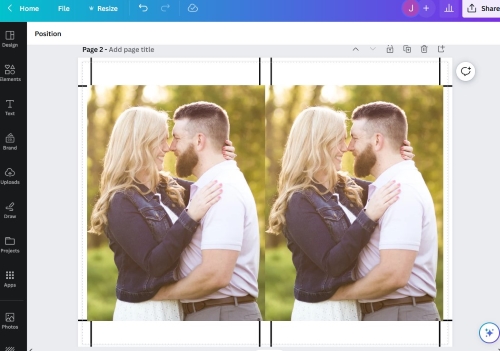
- Design the save the date card using the software of your choice. We are using a template found in Canva. You can design your invitations in Cricut Design Space if you prefer. You'll want to design two 5 x 7 inch layers. One to print on the vellum paper and a second for the photo layer.

Note: It may be more cost effective to order the photos from your favorite online photo print shop. Be sure to choose 5 x 7 inch as your photo size. Matte prints look best for these vellum layered save the dates. - Export the design as a png file if you're using Canva.

- Upload the png to Cricut Design Space. Choose Complex as image type.

- Save the files as Print Then Cut.

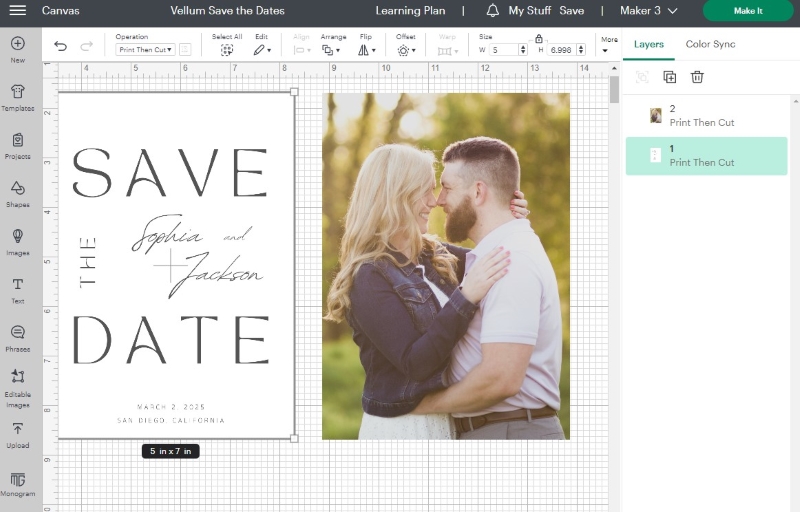
- Upload the files to the canvas in Design Space. Make sure both layers are 5 x 7 inches.

- Select Make It to do a test run of the save the date cards. Follow the prompts in Design Space and be sure to select the appropriate material type for the vellum and photo layer of the invitation. Make any adjustments needed to your design or Cricut settings.


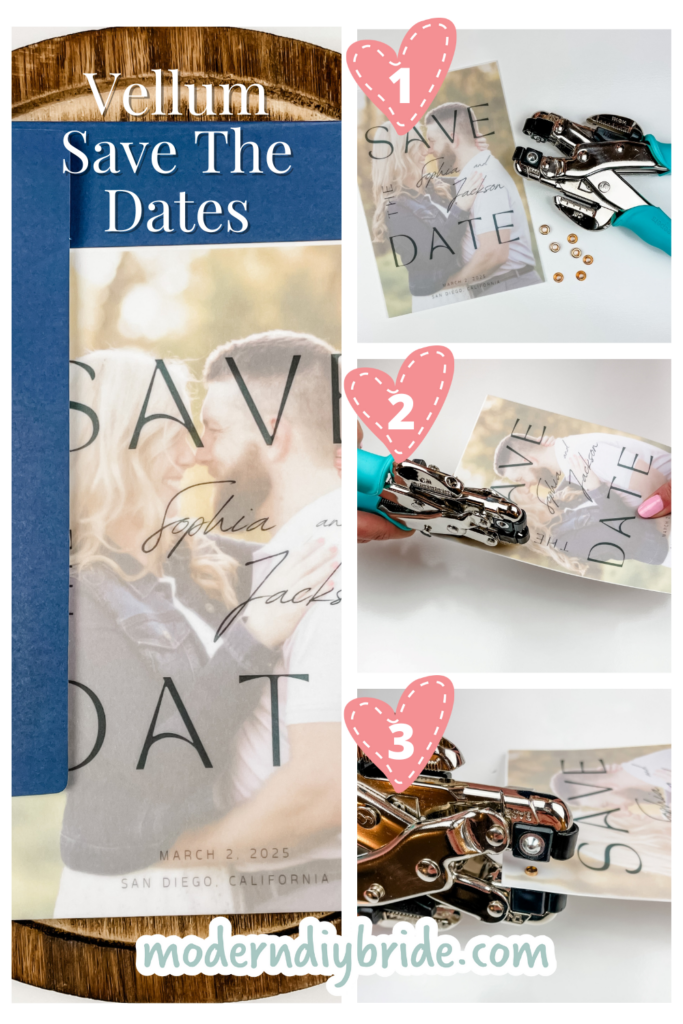
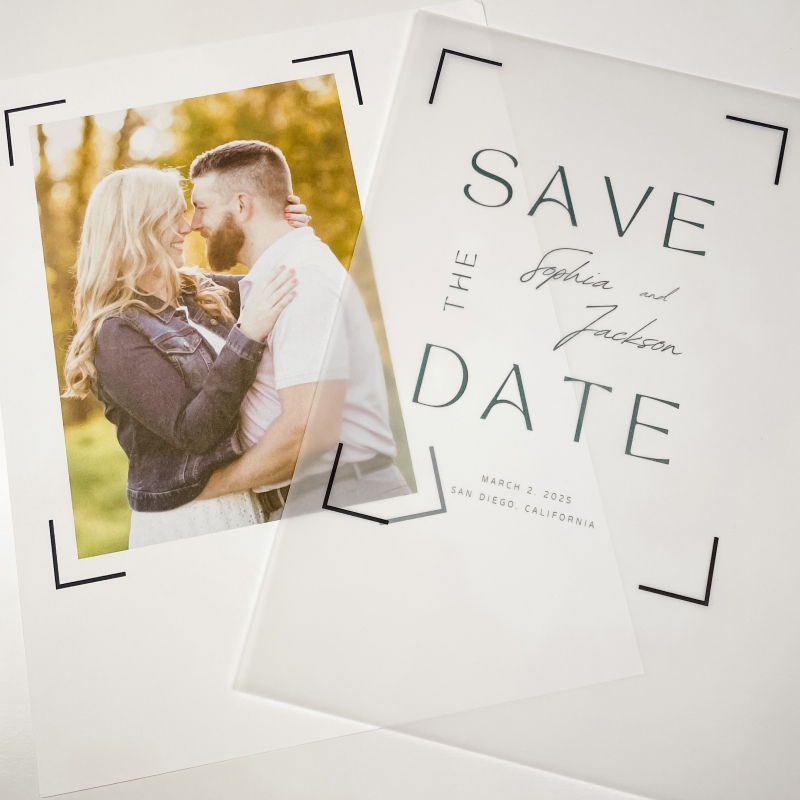
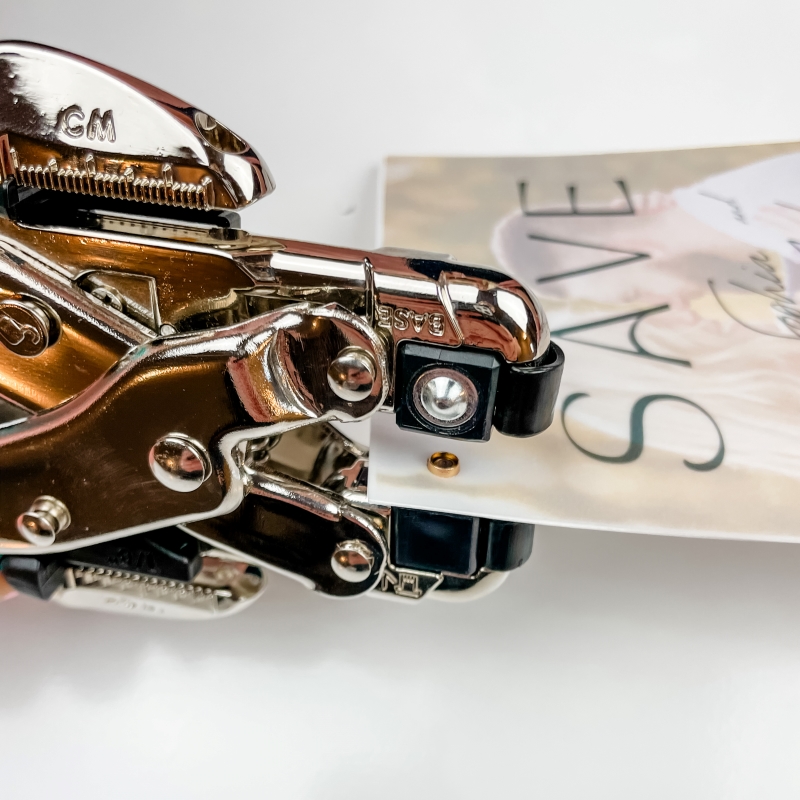
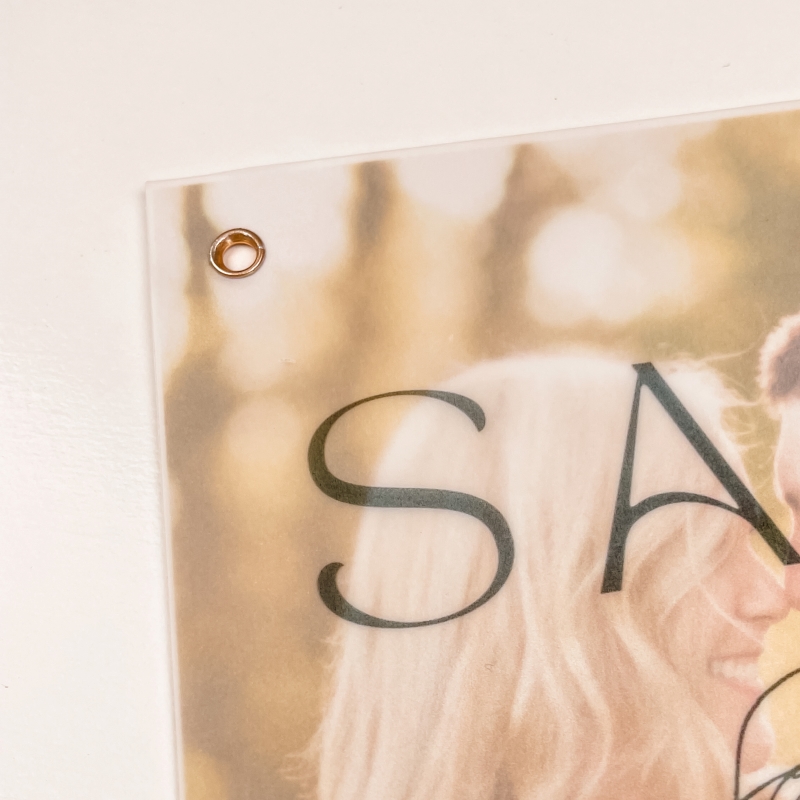
- After you have printed and cut the save the date cards, use the eyelet setting tool to punch a hole in both layers.
- Then, set the eyelet.


Notes
Before you send out your vellum save the dates, learn how to use your Cricut to address envelopes.
Recommended Products
This post includes affiliate links. This means I earn from qualifying purchases at no additional expense to you.
-
 100 Sheets Printable Translucent Vellum Paper, Tracing Paper for Invitation, Sketching, 93gsm (8.5 x 11 in)
 -
200Sets 3/16 Inch Eyelets and Grommets, Metal Eyelets Grommet Kit with Washers Backing Eyele for Fabric Clothing Tarps Leather Bag Shoes Eyelets Curtains Hats Tents Repair and Decoration (Gold)
-
We R Memory Keepers- Crop-A-Dile for Eyelets | Blue Comfort Handle


How to make vellum save the dates without a Cricut machine:
Step One: Open the Canva template and adjust the wedding details and swap out the photos.
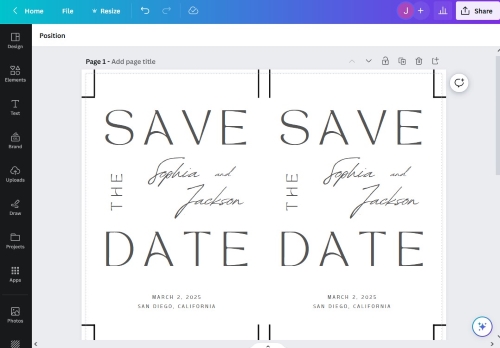
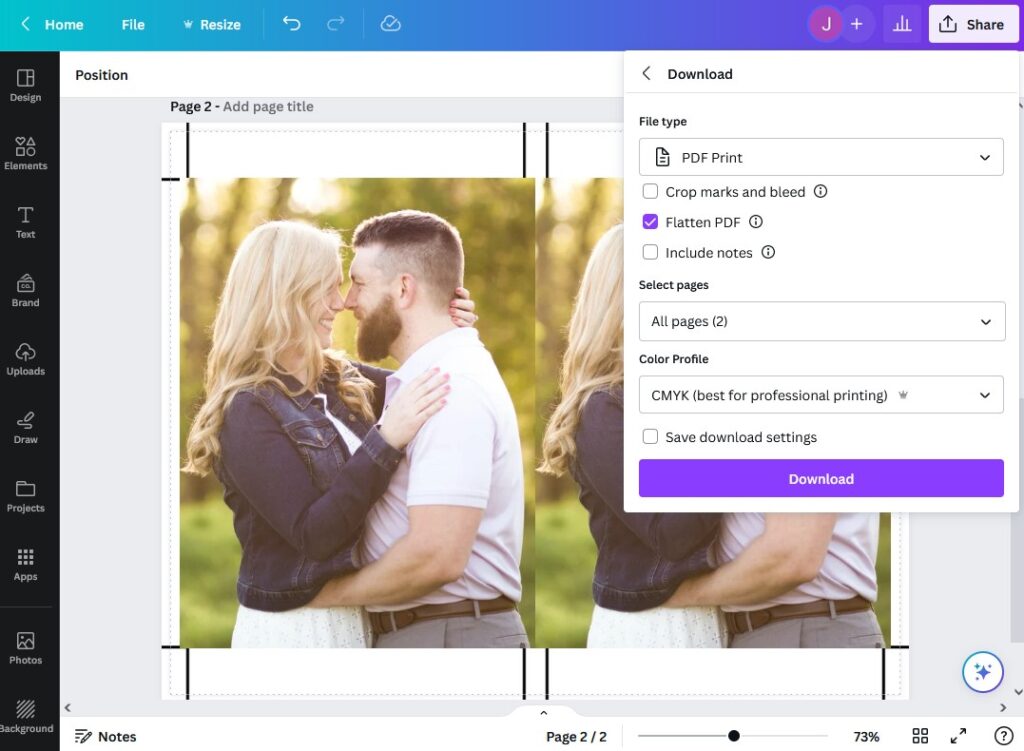
Step Two: Download the design as a PDF and print.
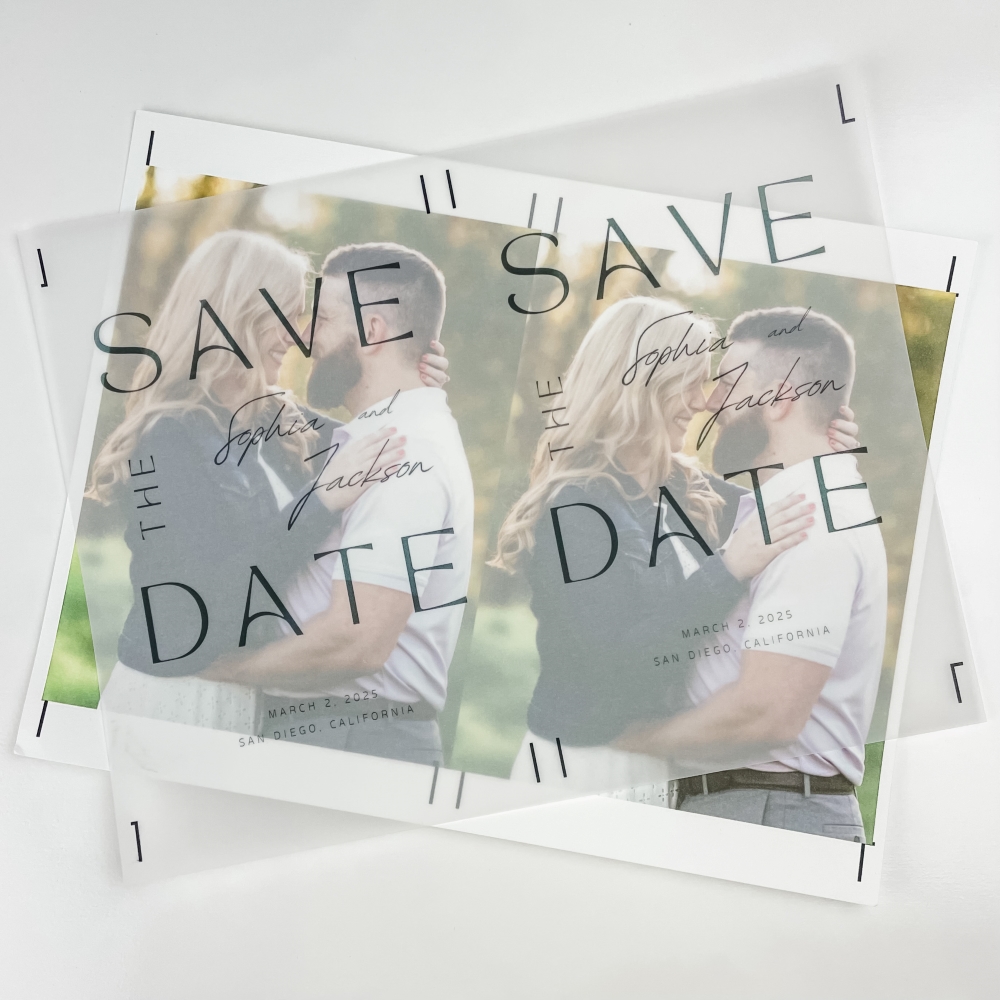
Step Three: Trim the cards using the trim marks.
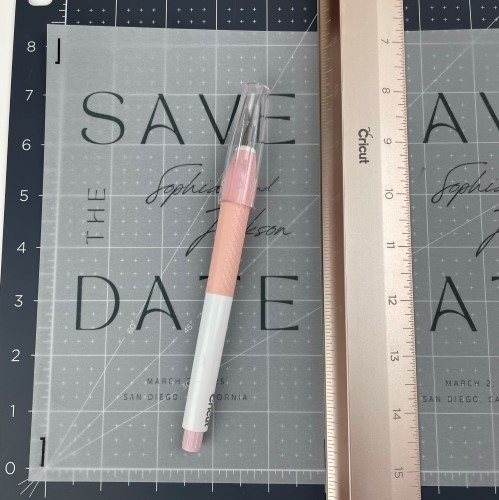
Step Four: Punch a hole, insert the eyelet, then set the eyelet.

Repeat these steps until you've created enough vellum save the date cards.