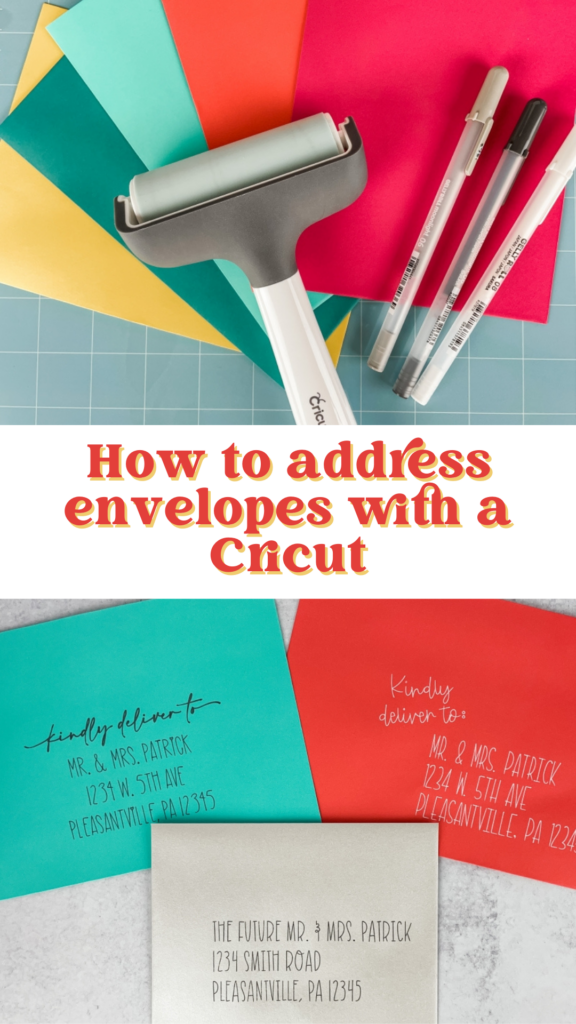
Learn to Address Envelopes With a Cricut
If you're using a Cricut for your wedding, you are probably interested in creating your wedding invitations. One of the most frequently asked questions in Cricut wedding forums is, "how do I address envelopes with a Cricut?" Most often, people get frustrated and end up giving up. In this tutorial, I will walk you through the steps you need to take to successfully address envelopes with your Cricut!
This post includes some affiliate links for your convenience. This means that if you make a purchase, I earn a small commission at no added cost to you. For more information check out my privacy policy and disclosure.
Table of Contents
- Using Cricut's New Card Mat to Address Envelopes
- Tips for Addressing Envelopes With a Cricut
- How to Address Envelopes Using a Cricut
- Troubleshooting Tips
Addressing Envelopes Using Cricut's New Card Mat
Cricut recently released a new cutting mat to solve the frustrating process of making cards with a Cricut. The card mat works with both the Cricut Explore and Maker machines. It has four panels that allow you to make up to four cards simultaneously. Not only does it help make card-making easier, but it also works with envelopes. Unfortunately, where Cricut fell short with this new cutting mat is that it only works with certain size cards (or envelopes).
- 3.5 in x 4.9 in
- 4.25 in x 5.5 in
- 4.5 in x 6.25 in
- 4.75 in x 6.6 in
- 4.75 in x 4.75 in
It is no surprise that Cricut designed the card mat to fit Cricut-specific materials. Unfortunately, they are notorious for doing this, and it can be really frustrating for those of us who love our Cricut machine but prefer using non-Cricut materials. That said, if your envelopes are within the sizes listed above, addressing envelopes just got easier! And, even if your wedding invitations need a larger envelope, the card mat could be a good solution for addressing response card envelopes with your Cricut.
For inspiration and support, be sure to join our free Facebook community: Cricut DIY Weddings.
To address envelopes with the card mat, follow these steps:
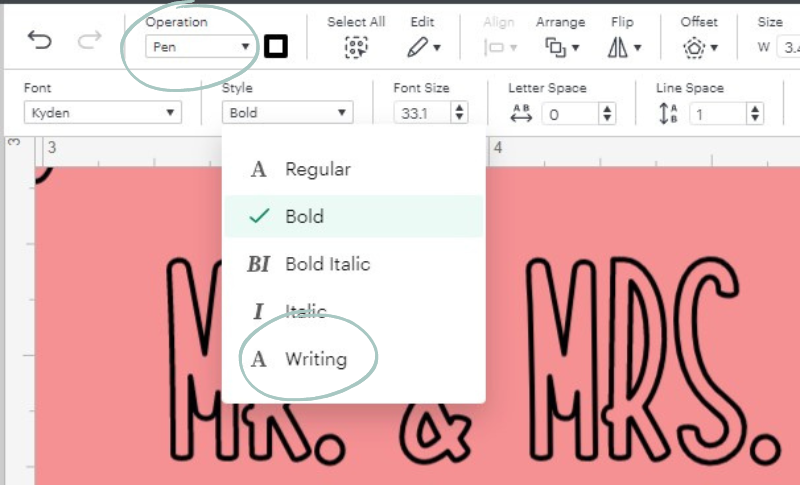
- Design the addresses in Cricut Design Space, adjust the font style to writing and the operation type to pen (or foil if you're using the foil tool).
- Attach the design and then select Make It.
- Select the card mat and adjust the size of the envelope on the left side of the screen.
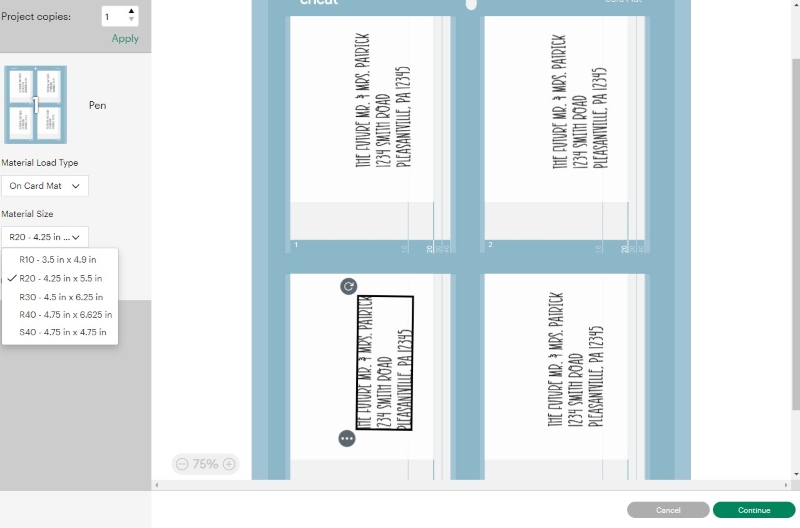
- Load the envelopes on the card mat, place your pen in Clamp A, and then load the Cricut Machine and press start.
- Once the Cricut is finished writing the addresses on the four envelopes, inspect the writing to makes sure all letters were drawn correctly. Do not unload your card mat yet. If the letters are a little on the light side, you can press start again and the Cricut will take another pass with the pen.
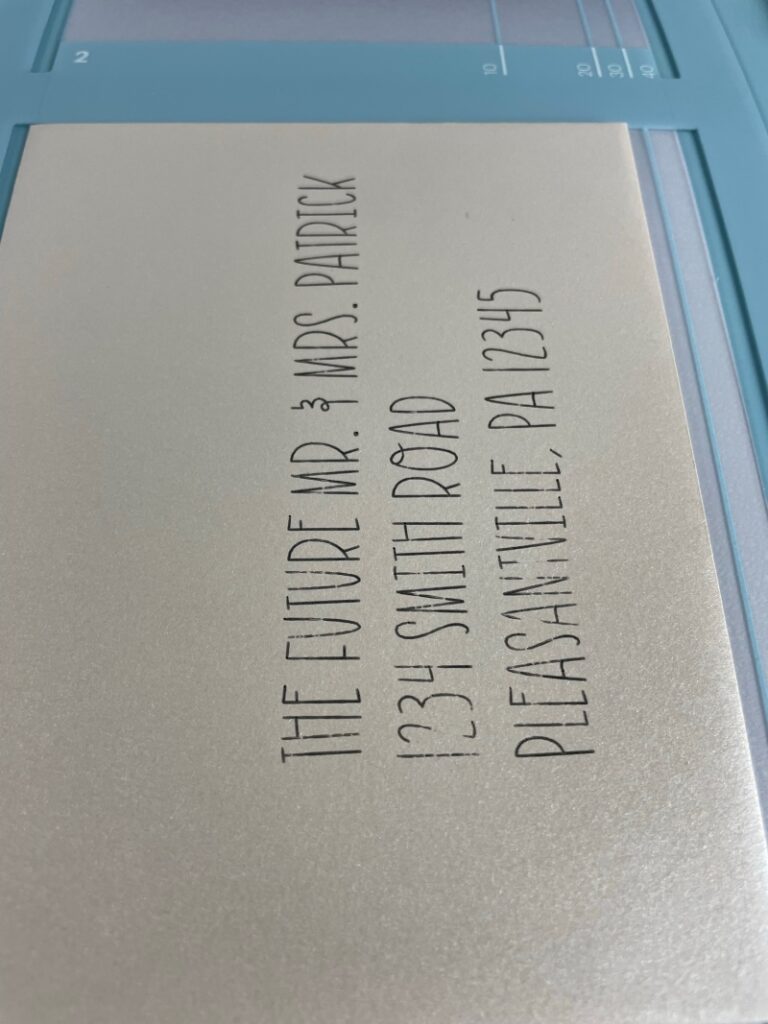

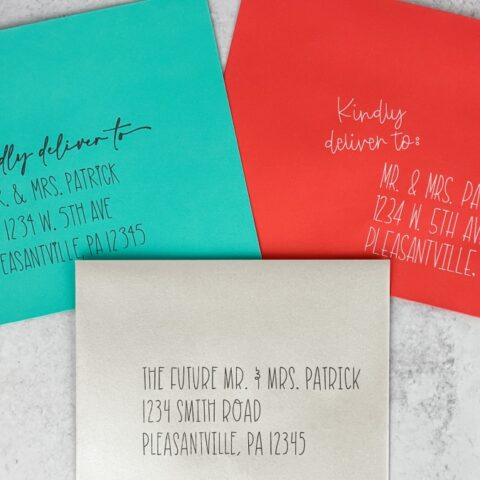
For those of you that are planning to send a standard 5 x 7-inch wedding invitation, keep reading. We will walk you through the steps to create beautifully addressed wedding invitations.
Tips For Addressing Envelopes With Your Cricut
It's all about the pen!
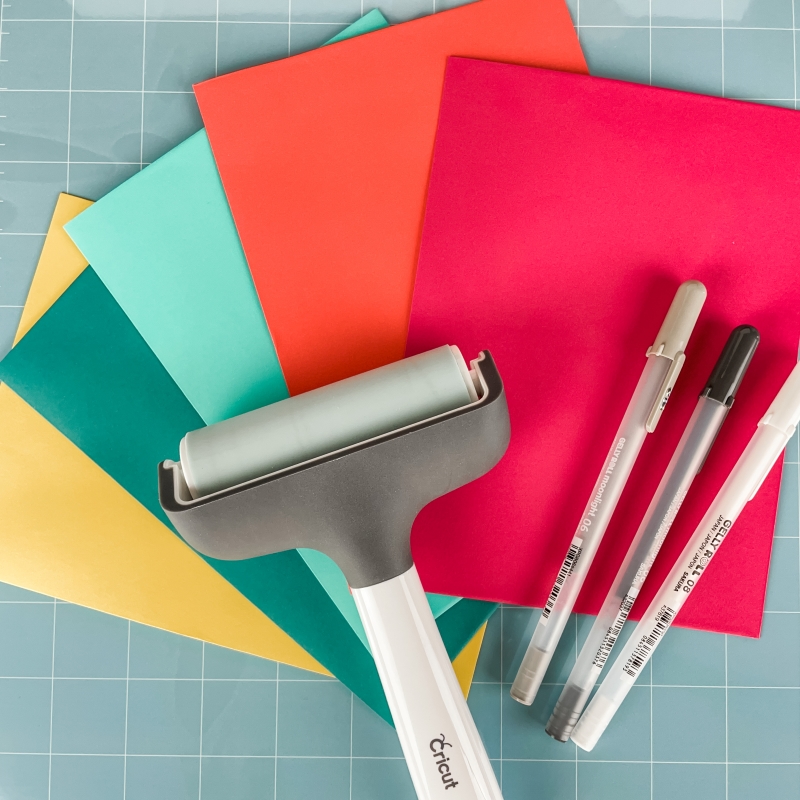
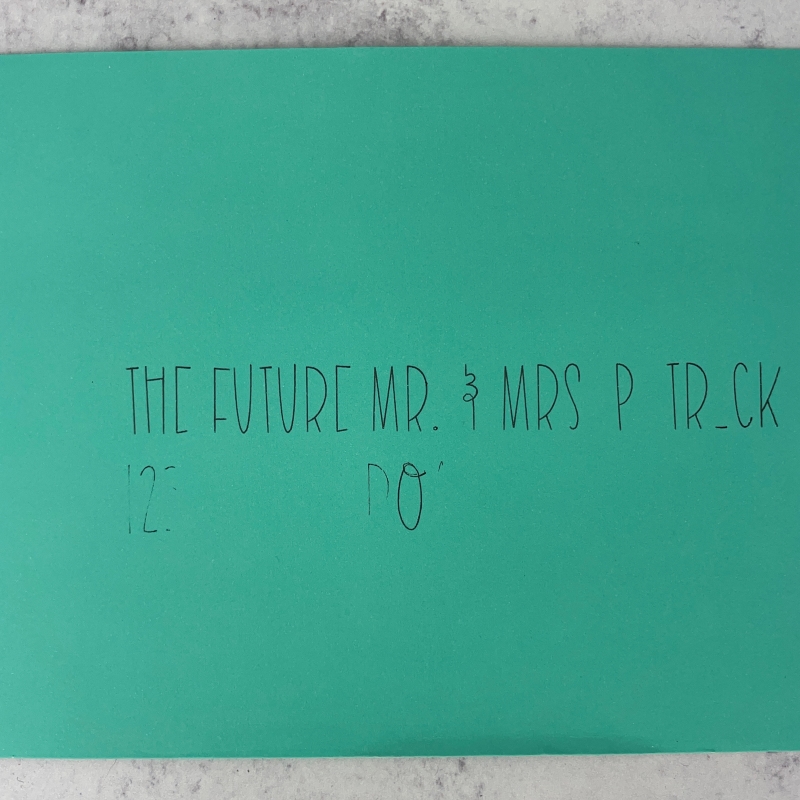
Choosing the right pen can make or break properly addressing envelopes with a Cricut. My go-to pens are Sakura Gelly Roll pens. I have never had one fail me. They come in many different color variations, but I like the white pens the best!
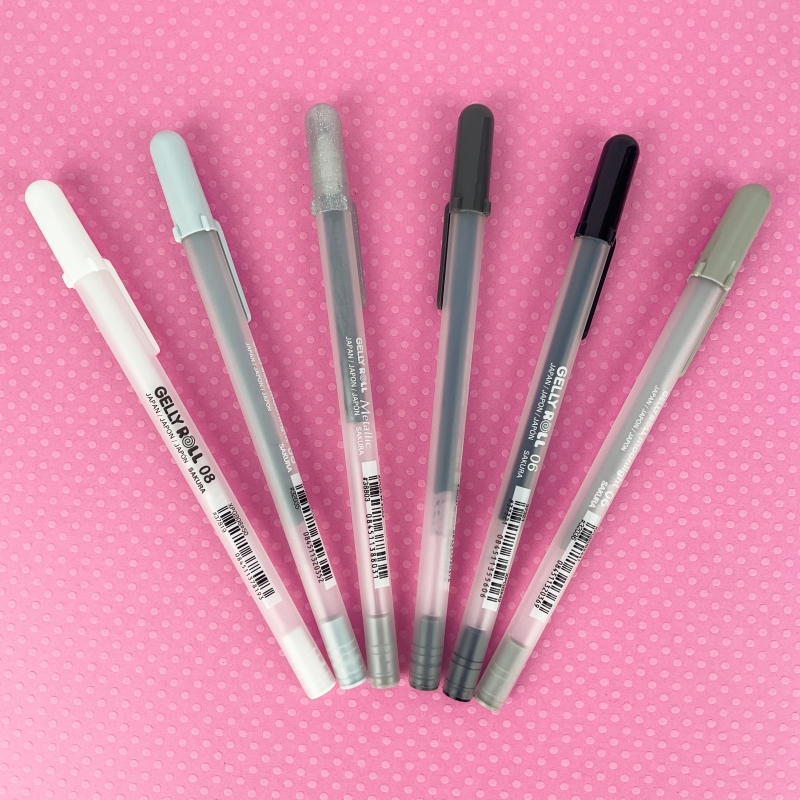
Gel pens are great when you want the font to appear fine. However, if you are going for a bolder font that really pops, you'll need to use a pen with a thicker point tip (1.0 mm or larger). If you decide for a larger point tip pen, you'll need to increase the space between letters so they do not overlap.
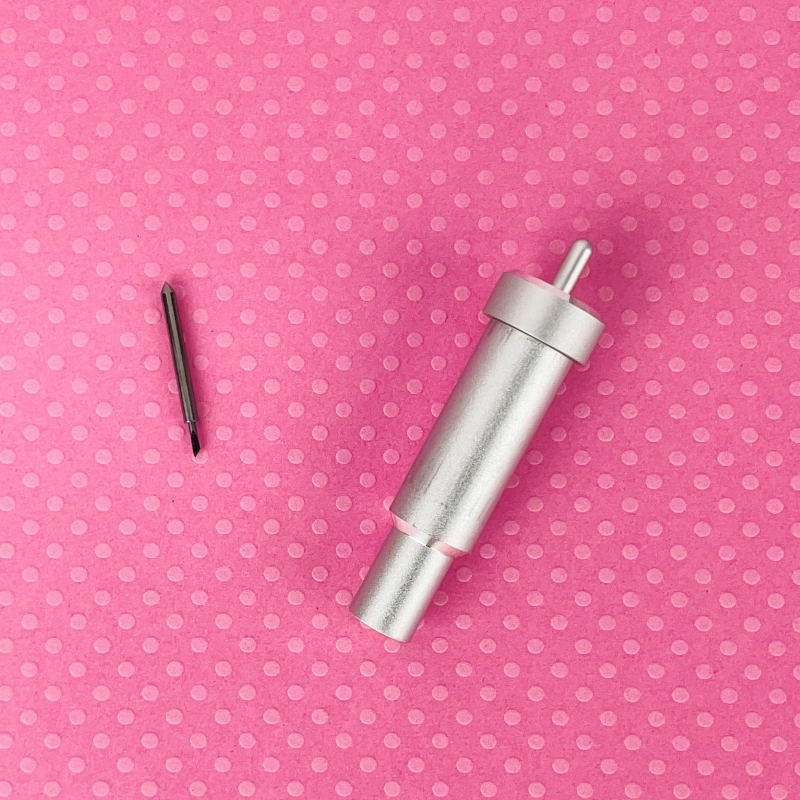
If you use a non-Cricut pen, you will also need to get an after-market pen adapter. Using any after-market tool on your machine will void your warranty. So, if your machine is still under warranty, you'll have to evaluate if using a pen adapter is worth it. If it isn't, then use one the Cricut pens.
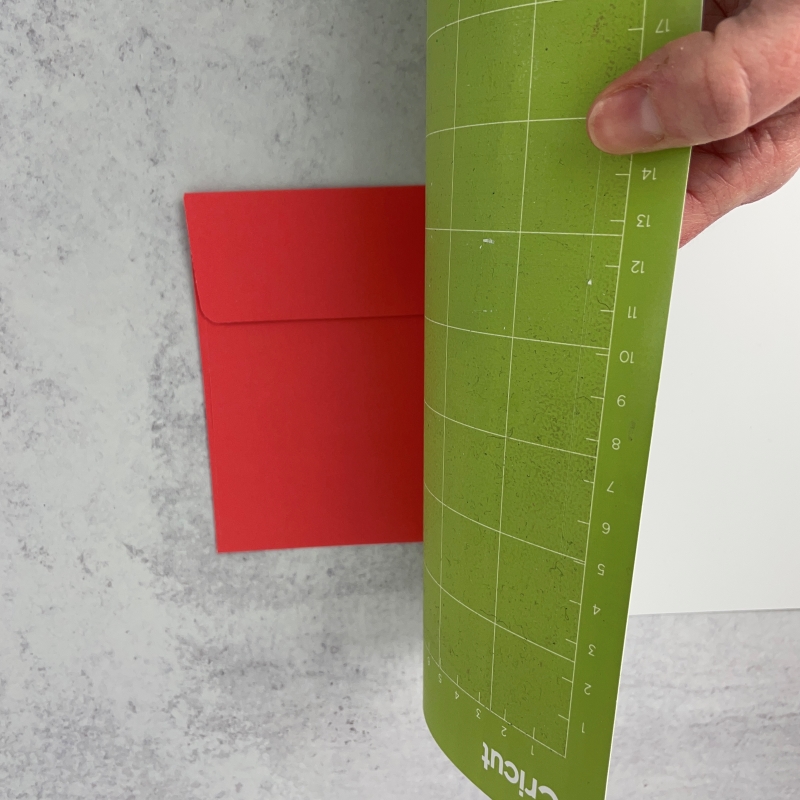
Secure the envelope to the cutting mat.
If you don't have a brayer tool, get one. You want to ensure the envelope is tightly secured to the cutting mat before addressing them. I use Cricut's brayer tool, but I have also seen less expensive versions at the Dollar Store or my favorite craft store. It doesn't have to be the Cricut brand tool, just get one and use it.
Let's talk fonts.
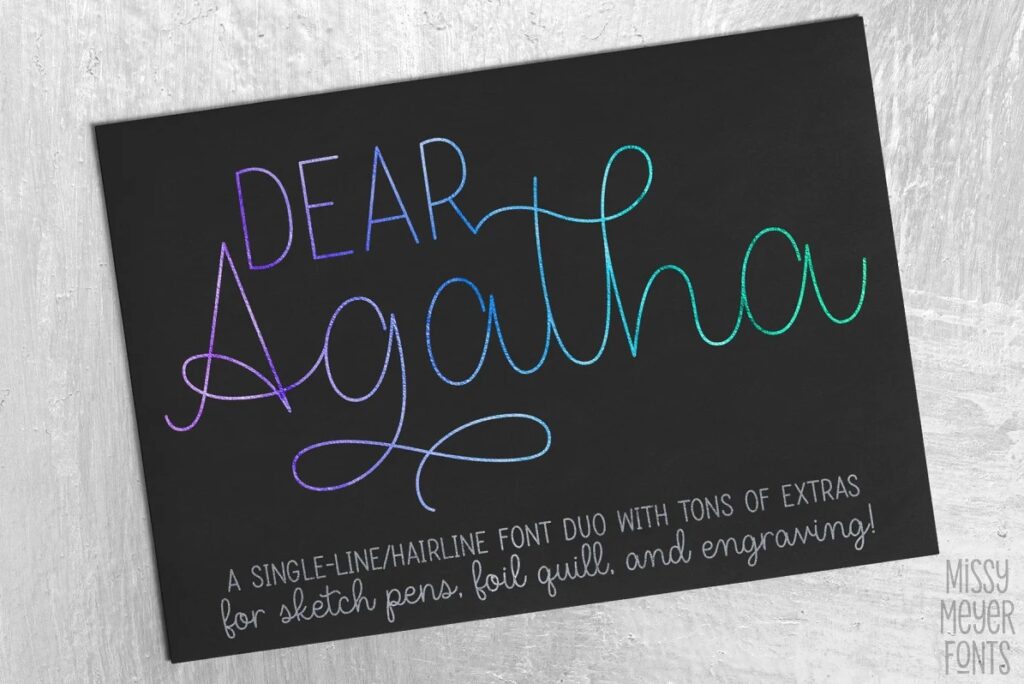
This topic causes the most distress for people trying to address envelopes. I see this question asked repeatedly, "why is my machine writing bubble letters?" If you are using the pen tool with a Cricut, you need to use a single-line (also called writing) font. I talk extensively about single-line fonts in another blog post. If you aren't familiar with them, read the Ultimate List of Single Line Fonts for Cricut before addressing any envelopes to avoid pulling your hair out or throwing your machine across the room (just kidding).
Here are a few of my favorite writing fonts for Cricut:


Trick your Cricut for perfectly aligned addresses.
If using the card mat is not an option, you'll need to trick your Cricut so that you can have perfectly aligned addresses on your envelopes. To do this, create a rectangle that is the same dimensions as your envelope. If you're using an A7 envelope, then you'll want to make a rectangle that is 5.25 inches tall by 7.25 inches wide.
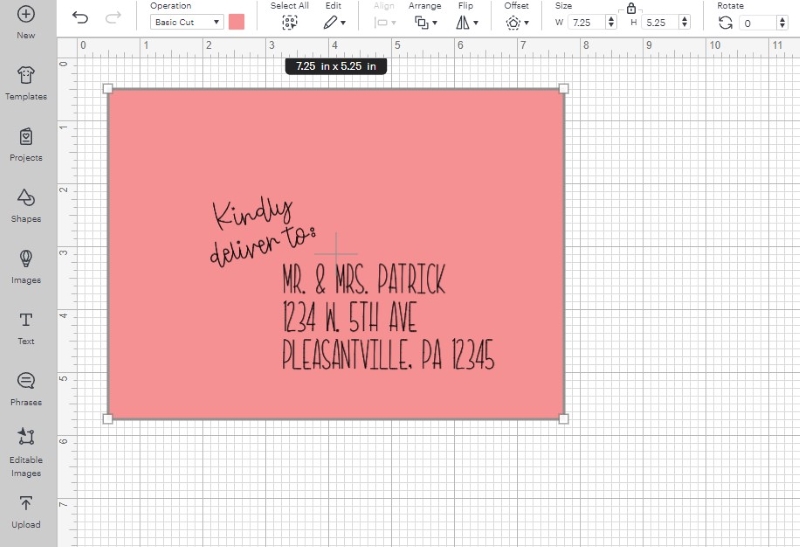
Format your address and make sure it fits appropriately inside the rectangle. Change your text style to writing and the operation type to pen. Remove the blade from your fine point blade tool then place the tool (without the blade) back into Clamp B.
In Cricut Design Space, select the text and the rectangle and then select attach. When you send the project to your machine, it will use the pen tool first and then it will cut the rectangle. Since you've removed the blade it won't cut anything. Just be sure that you move the rectangle and text in Design Space to the exact spot you've placed the envelope on your cutting mat.
How to Address Envelopes With a Cricut
To address envelopes using a Cricut machine, you'll need to follow these steps:
Materials
Instructions
- Prepare your materials: You'll need a Cricut machine, a cutting mat, a pen or marker, and envelopes.

- Format the address: Use Cricut Design Space to format addresses for your envelope. It is helpful to draw a rectangle that is the size of your envelope. This allows you to ensure the size and format of the addresses will fit properly on the envelope. Just make sure to delete or hide the rectangle before you send the design to your Cricut.

Another option is to leave the rectangle, select the text and the rectangle and then select attach in Design Space. Next, remove the blade from the fine point blade tool and replace the tool in Clamp B. This tricks the machine into thinking it is cutting the rectangle while allowing you to perfectly align your addresses to the envelope every time!
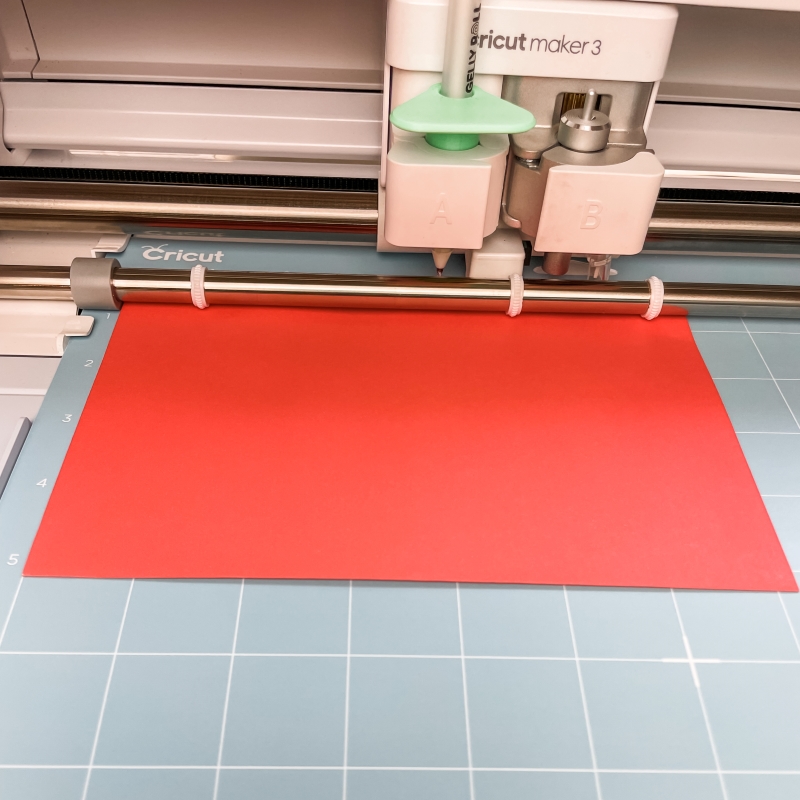
Tip: When using the pen tool to address envelopes, choosing single-line fonts and designs is essential. You can learn more about single-line fonts here. - Load your materials: Place your envelope onto the cutting mat and align the design in Design Space to where you've placed the envelope on the mat. Then, load it into your Cricut. Select light cardstock or copy paper when choosing your material in Cricut Design Space.
- Draw the address: Once you've loaded the cutting mat to the Cricut, press Start. The machine will draw the address on your envelope using the pen tool in clamp A.
- Remove the envelope: Once the address has been drawn, carefully remove it from the cutting mat by flipping the cutting mat upside down and then carefully bending the edges of the mat back. If you try to remove the envelope by pulling up off the cutting mat, your envelope will bend.
- Add any additional embellishments: If desired, place the envelope back on the cutting mat to write other details on the back - like a return address or fun graphic.
- Repeat to address the remaining envelopes: Repeat these steps until you have addressed all of your envelopes.
Notes
With a Cricut machine, you can add a personal touch to your envelopes and make your mail stand out. Have fun creating!
Recommended Products
This post includes affiliate links. This means I earn from qualifying purchases at no additional expense to you.


Troubleshooting Tips For Addressing Envelopes With a Cricut
Why is my Cricut drawing bubble letters?
First, check to make sure that you've selected a writing font (aka single-line font) in Design Space. If you have, the next thing to check is your operation type. The operation type should be set to pen (or foil if you're using the foil tool).
Why is the pen not drawing on the envelope?
If the pen on your Cricut machine isn't drawing on the envelope or only drawing in some spots, you probably don't have the pen inserted properly. Make sure that the pen is pressed all the way down in Clamp A.
I'm using a regular cutting mat, and the envelope keeps slipping during the drawing process. Why is this happening?
If your envelope isn't staying in place on the Standard Grip cutting mat, try these two tips:
- Use a brayer to secure the envelope to the cutting mat.
- If you've tried this and your envelope still won't stick, place a small amount of painter's tape on the edge of the envelopes. This will add extra security to the envelope and help it stay in place.
Why is my envelope bending when I remove it from the cutting mat?
Instead of pulling the envelope straight off the cutting mat, flip the cutting mat upside down and gently bend the edges back. This will allow gravity to assist with removing the envelope from the cutting mat without bending. This trick works when removing cardstock and other materials as well.
Are you looking for inspiration for creating wedding invitations with your Cricut? Check out these tutorials: