DIY Our First Christmas as Mr. and Mrs. Ornament - Free SVG File

With the holidays finally here, it's time to start creating your DIY Christmas project list! One item to add to that list is an 'Our First Christmas As Mr. and Mrs." ornament. This tutorial will show you how to make a Christmas ornament that commemorates your first shared holiday as a married couple!
To get started you'll need:
- A cutting machine - we are using a Cricut Maker
- Premium vinyl
- Transfer tape
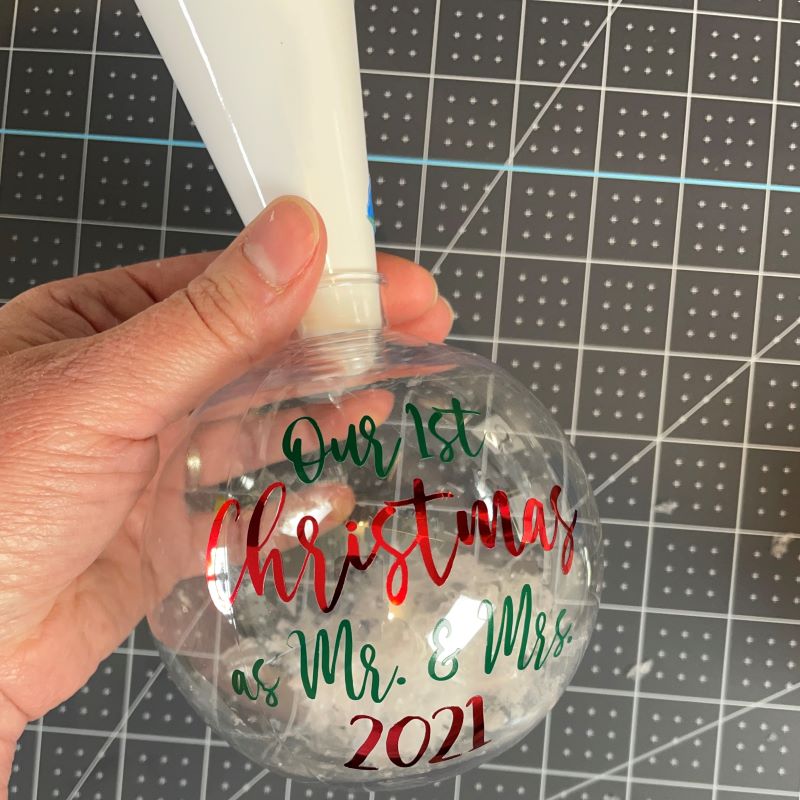
- An ornament blank, like this one
- Buffalo Snow to fill the ornament
- A weeding and scraping tool
Be sure to visit our design file library to download the free SVG file for this tutorial. If you don't have a password to the design file library, you can snag one here.
This post includes some affiliate links for your convenience. This means that if you make a purchase, I earn a small commission at no added cost to you. For more information check out my privacy policy and disclosure.

How To Make An Our First Christmas As Mr. and Mrs. Ornament
What a perfect way to commemorate your first Christmas as a married couple by creating a DIY ornament.
Materials
Tools
Instructions
- Download the free SVG cutting file for the Our First Christmas As Mr. and Mrs. Ornament in our free design file library. If you still need a password, you can get one here.

- Open Cricut Design Space and upload the SVG file and place it on your canvas.

- Ungroup the file and adjust the colors to coordinate with the vinyl colors you will be using.

- Add registration marks for each layer of vinyl that you'll be cutting.

- Select all the elements in a single color, group, and attach. Repeat for additional colors. In my design, I am using two colors, green and red.

- Load your cutting mats with vinyl. Select 'Make It' and follow the prompts in Design Space.

- Weed the vinyl.

- Add transfer tape to one color of vinyl and layer it on the second color taking care to align the registration marks.
- Use your scraping tool to ensure all layers of vinyl adhere to the transfer tape.
- Use scissors to cut away the registration marks and add three side cuts to each side of the transfer tape. This helps when applying vinyl to a curved surface.
- Carefully transfer the vinyl to the ornament.

- Finally, make a funnel with a sheet of paper and fill the ornament with Buffalo Snow.