Acrylic Wedding Invitations Using a Cricut
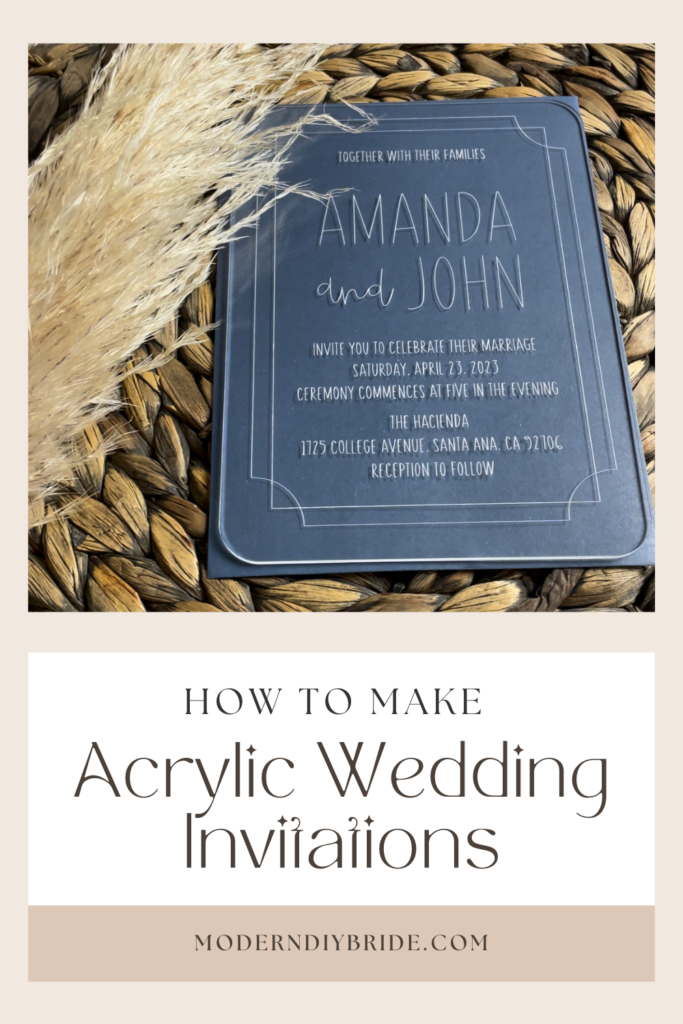
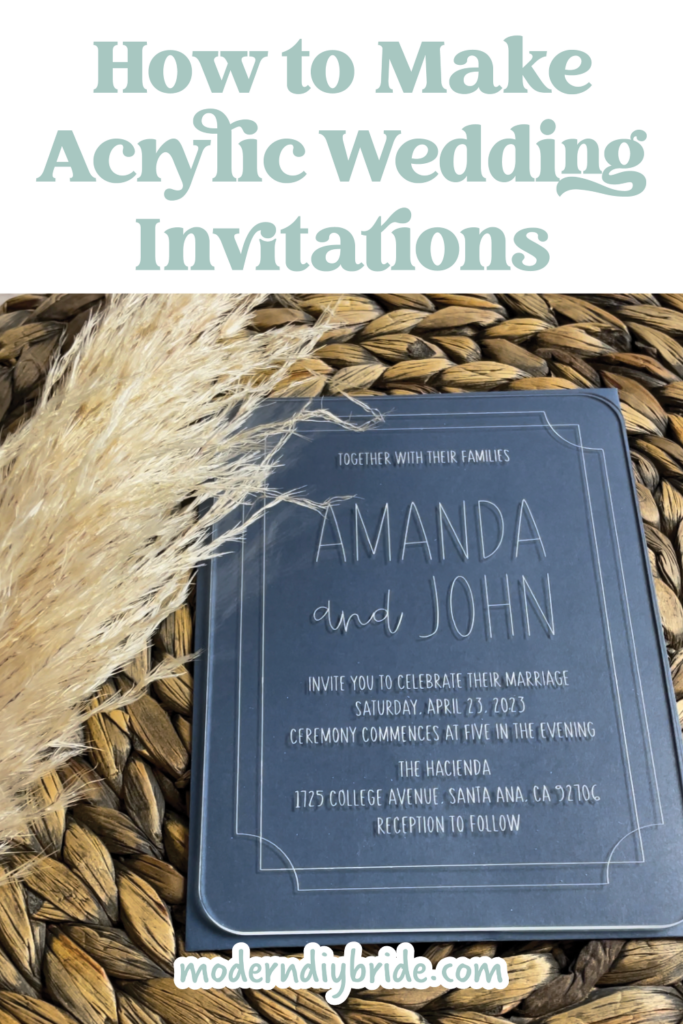
If you're considering making acrylic wedding invitations to mail to wedding guests, this post will walk you through everything you need to know (including how to make them with your Cricut Maker). Acrylic wedding invites add a special touch of elegance and can make a beautiful keepsake. However, before you commit, you should consider how to properly package acrylic invitations so they arrive in one piece, what types of envelopes are appropriate for mailing acrylic, and how to add postage correctly.
This post includes some affiliate links for your convenience. This means that if you make a purchase, I earn a small commission at no added cost to you. For more information check out my privacy policy and disclosure.
Table of Contents
- Supplies Needed to DIY Acrylic Invitations With a Cricut
- Where to Buy Blanks for Acrylic Invitations
- Mailing an Acrylic Wedding Invitation
- How Much Does it Cost to Make an Acrylic Invitation?
- Tutorial: How to Make Acrylic Wedding Invitations With a Cricut
Supplies Needed to DIY Acrylic Invitations With a Cricut
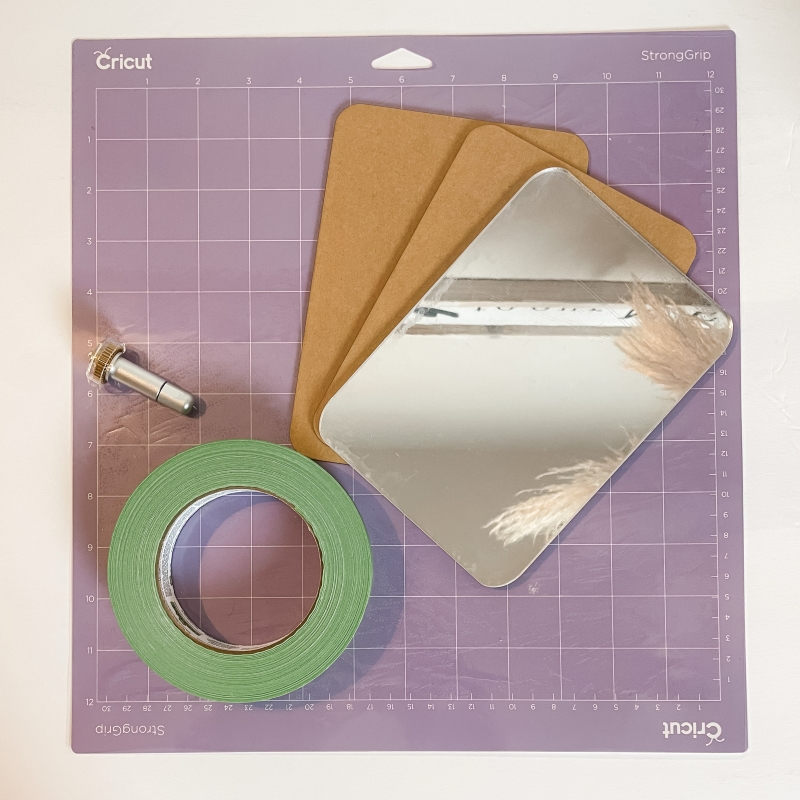
To get started, you'll need a few tools and materials:
Tools:
- Cricut Maker
- Strong Grip Cutting Mat (purple mat)
- Engraving Tip and Quick-Swap Housing Tool (if you are new to the engraving tool, read this article first to familiarize yourself.)
Materials:
- Acrylic Blanks
- Masking or painter's tape
Where to Buy Blanks for Acrylic Invitations
Several acrylic suppliers will cut acrylic into custom shapes. Both Houston Acrylic and Custom Made Better are suppliers that I recommend. You may have to reach out directly and ask for a custom order of acrylic blanks. At the time of this article, neither supplier carried this size acrylic blank in the 1/16 inch (2 mm) 5 x 7 rectangle. Remember that the Cricut Maker can only work with less than 2.4 mm thick material. Most acrylic is 1 mm, 2 mm, and 3 mm thick. For this project, I am using 2 mm thick clear cast acrylic, and I've chosen 5 x 7 sheets with rounded edges.
Mailing an Acrylic Wedding Invitation
Below are tips for mailing your invitations. Even with using both of these tips, I highly suggest sending a couple of invitations through the mail as a test before moving forward with shipping all of your invites. This will take some forward planning but will be worth troubleshooting any identified issues.
Postage for Mailing Acrylic
While acrylic is sturdier than glass, it can still break and shatter. If you are going to the trouble of hand-making each acrylic invitation, it would be a shame for them to arrive in your guest's mailboxes broken. I'm certain that is not the impression you're trying to make. So, how do you avoid breakage? Well, one way is to send your invitations in bubble mailers. This will add extra protection during the shipping process. That being said, it is not common for a wedding invitation to arrive in a bubble mailer, and that probably isn't your first choice.
Another way to avoid breakage during shipping is to hand-cancel mail through the United States Postal Service. What does hand-cancel mean? Essentially, this tells USPS not to send your envelopes through the automated postage machines. Each envelope will have to be hand-stamped with the date and location they are shipping from. This does not mean that they won't still be sorted through the automated belts with the rest of the mail. But it does prevent the added machining for the postmark. Please know that there is an added expense for hand-canceling your mail, and some post offices will make you hand-cancel your own mail while they supervise.
Choosing the Proper Envelopes
As mentioned above, acrylic is fragile and can break easily. With this in mind, you'll want to choose a heavier-weight envelope stock to ship acrylic invitations. A good weight is between 80 lb and 100 lb envelope stock. Most companies that sell bulk envelopes for wedding invitations (like envelopes.com) carry this weight of envelopes.
How Much Does it Cost to Make Acrylic Invitations?
An acrylic invitation blank will likely cost between $1.50 and $2.00 each. Plus the cost of the envelope. Premium envelopes typically cost $0.30 each. For postage, you can expect to pay the cost of a first-class stamp ($0.63 at the time of this article) plus a $0.21 fee for hand-canceling per invitation. So, you can expect to pay between $2.63 and $3.00 (including postage) per invitation. Compare that to the average cost of 2 mm acrylic invitations from places like Elegant Wedding Invites and you'll likely see a cost savings of three to four dollars per invitation.
How to Make Acrylic Wedding Invitations With a Cricut
How to Make Acrylic Wedding Invitations With a Cricut
Learn how to make beautiful, engraved acrylic wedding invitations with your Cricut Maker.
Materials
- Clear Acrylic Invitation Blanks (1/16" or 2 mm)
Tools
- Cricut Maker
- Engraving Tip w/ Quick-Swap Housing Tool
- Strong Grip Cutting Mat
- Painter's tape or masking tape
- Microfiber Cloth
Instructions
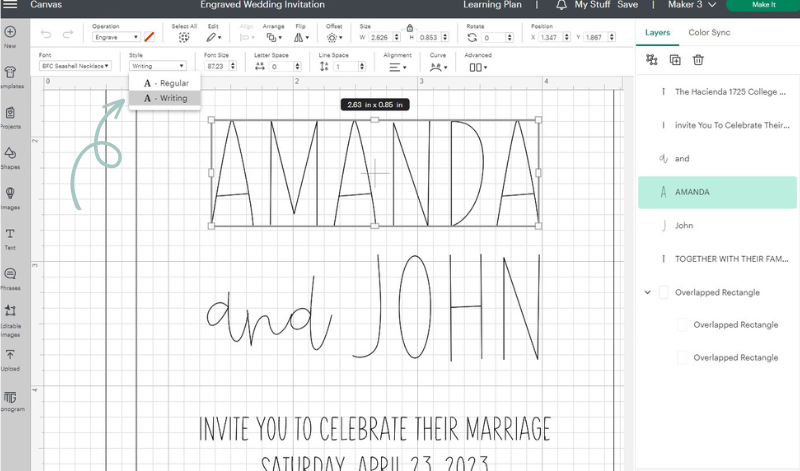
- Design your wedding invitation in Cricut Design Space. Remember, you want to use a single-line font and single-line design elements for engraving projects. Otherwise, your font and design will be outlined.

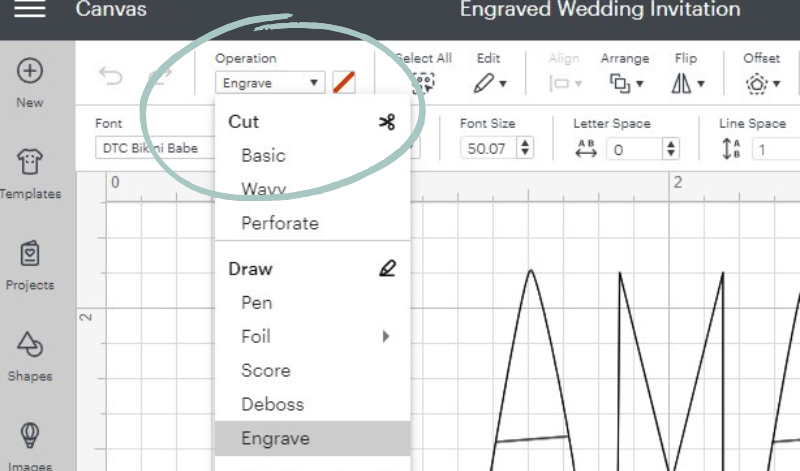
- Select all and change the operation type in Cricut Design Space to engrave. Select attach and then select make it.
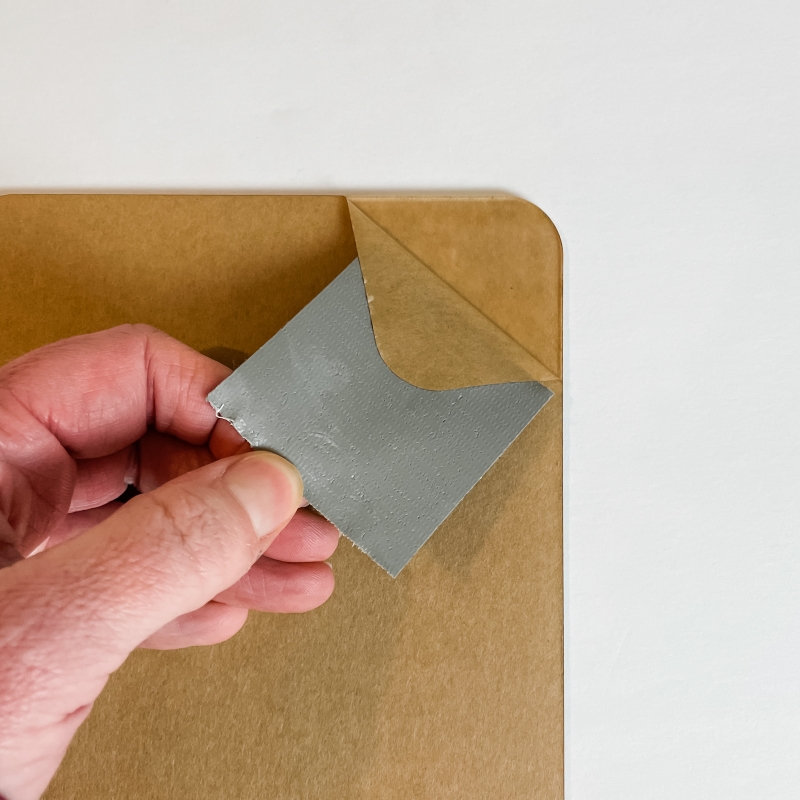
- Remove the paper masking from one side of the acrylic invitation.

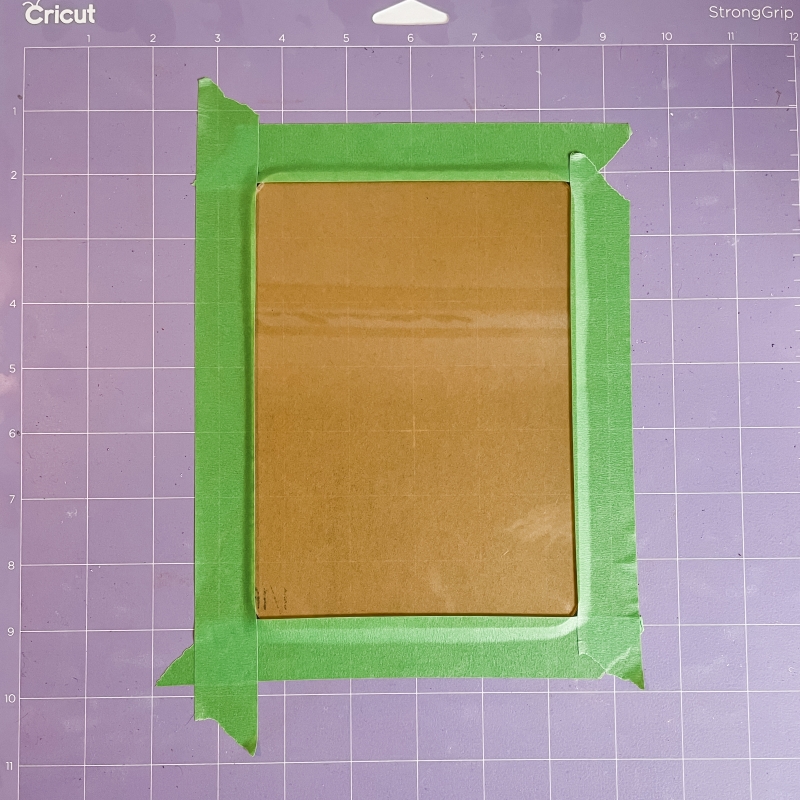
- Secure your acrylic (masking side down) to a strong grip cutting mat. Move the white star wheels on your Cricut Maker all the way to the right.
- Follow the prompts in Cricut Design Space, including choosing acrylic as the material type.
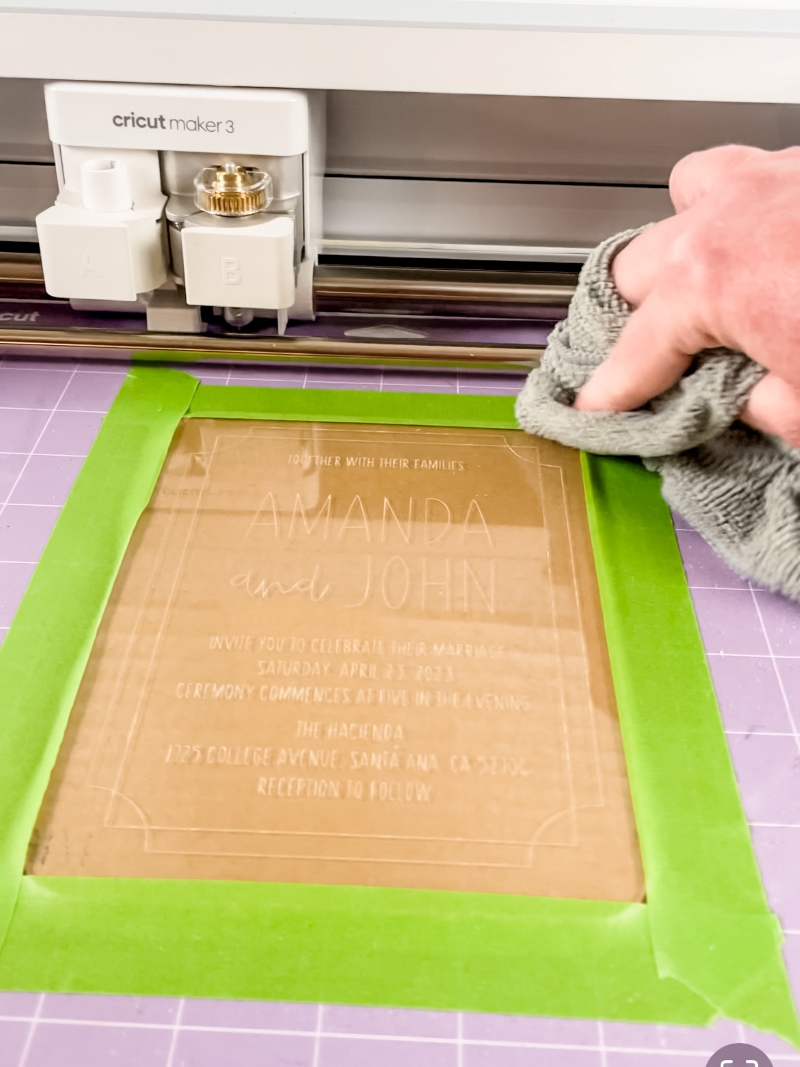
- Press start on your Cricut Maker and watch as the machine engraves the acrylic invitation.
- After your Cricut completes the engraving process, use a microfiber cloth to remove the excess material from your project and gently wipe down your Cricut Maker. Wipe from the inside out. Remove the paper masking from the backside of the acrylic invitation blank.

- Repeat steps 3 through 6 until you are done with your invitations.
Notes
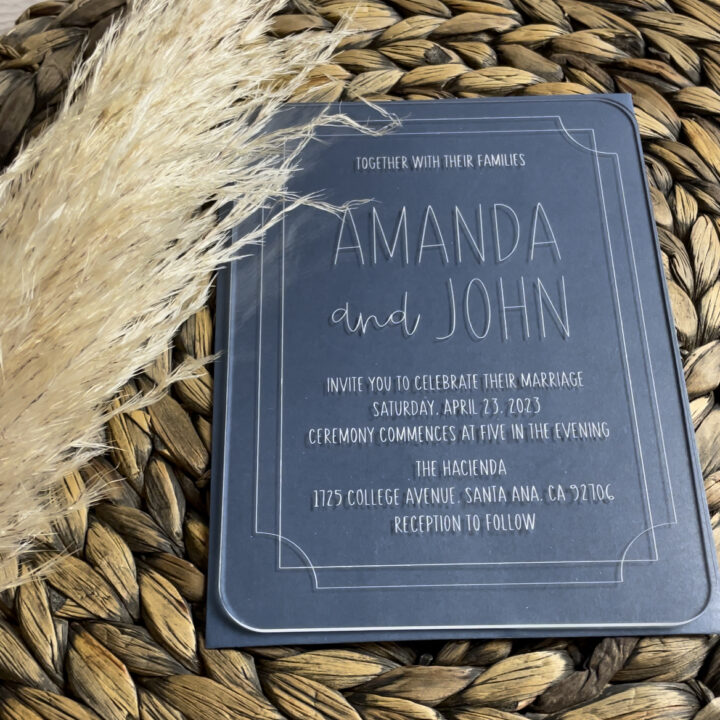
Both clear and mirror acrylic work great for engraving with the Cricut Maker. If you choose to make your invitations out of mirror acrylic, you'll want to engrave from the backside of the acrylic blank. This requires you to mirror your design before sending it to your Cricut.
Cricut fonts used: BFC Seashell Necklace & DTC Bikini Babe
If you like the look of acrylic for your wedding, you may also be interested in these tutorials:
Click here for more Cricut wedding invitation ideas.