Easy DIY Bridesmaid Proposal Calendar (Free Download)

This tutorial has everything you need to create stunning bridesmaid proposal calendars - including a free design file download! Are you getting ready to ask your best gal pals to be part of your big day? If so, these proposal calendars will make a great addition to your bridesmaid proposal box!
For inspiration and support, be sure to join our free Facebook community: Cricut DIY Weddings.
A bridesmaid proposal is a fun and creative way to announce your engagement and ask friends and family to be in your wedding party.
As early as possible! You'll want to give your friends and family time to make travel arrangements. There are a lot of expenses associated with being in a wedding, so giving plenty of notice allows people time to budget.
The options are really limitless. Some great items to pub in a bridesmaid proposal box are candles, lip gloss, silk robes with their name embroidered on the back, personalized items like wine glasses or tumblers, personalized notebooks or planners, and of course mini champagne bottles are always a hit!
Etsy is a great resource for purchasing made-for-you bridesmaid proposal boxes. The post 10 Gorgeous Bridesmaid Proposal Box Ideas features my favorite Etsy finds.
Get Access To Our Free Design File Library
How To Make a Bridesmaid Proposal Calendar
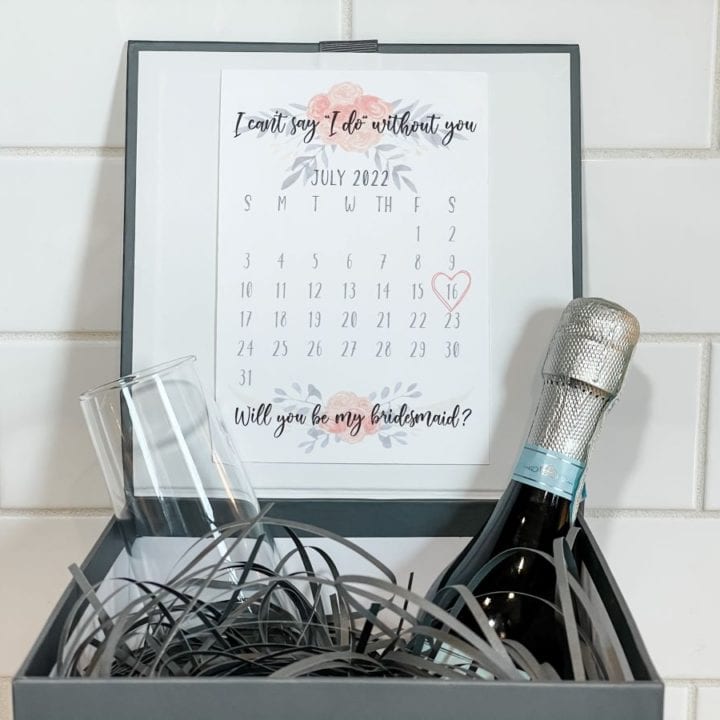
Easy DIY Bridesmaid Proposal Calendar
Use our free design files to create beautiful bridesmaid proposal calendars.
Materials
Tools
- Cricut Maker
- Fine Point Blade
- LightGrip Cutting Mat
- Inkjet Printer
Instructions
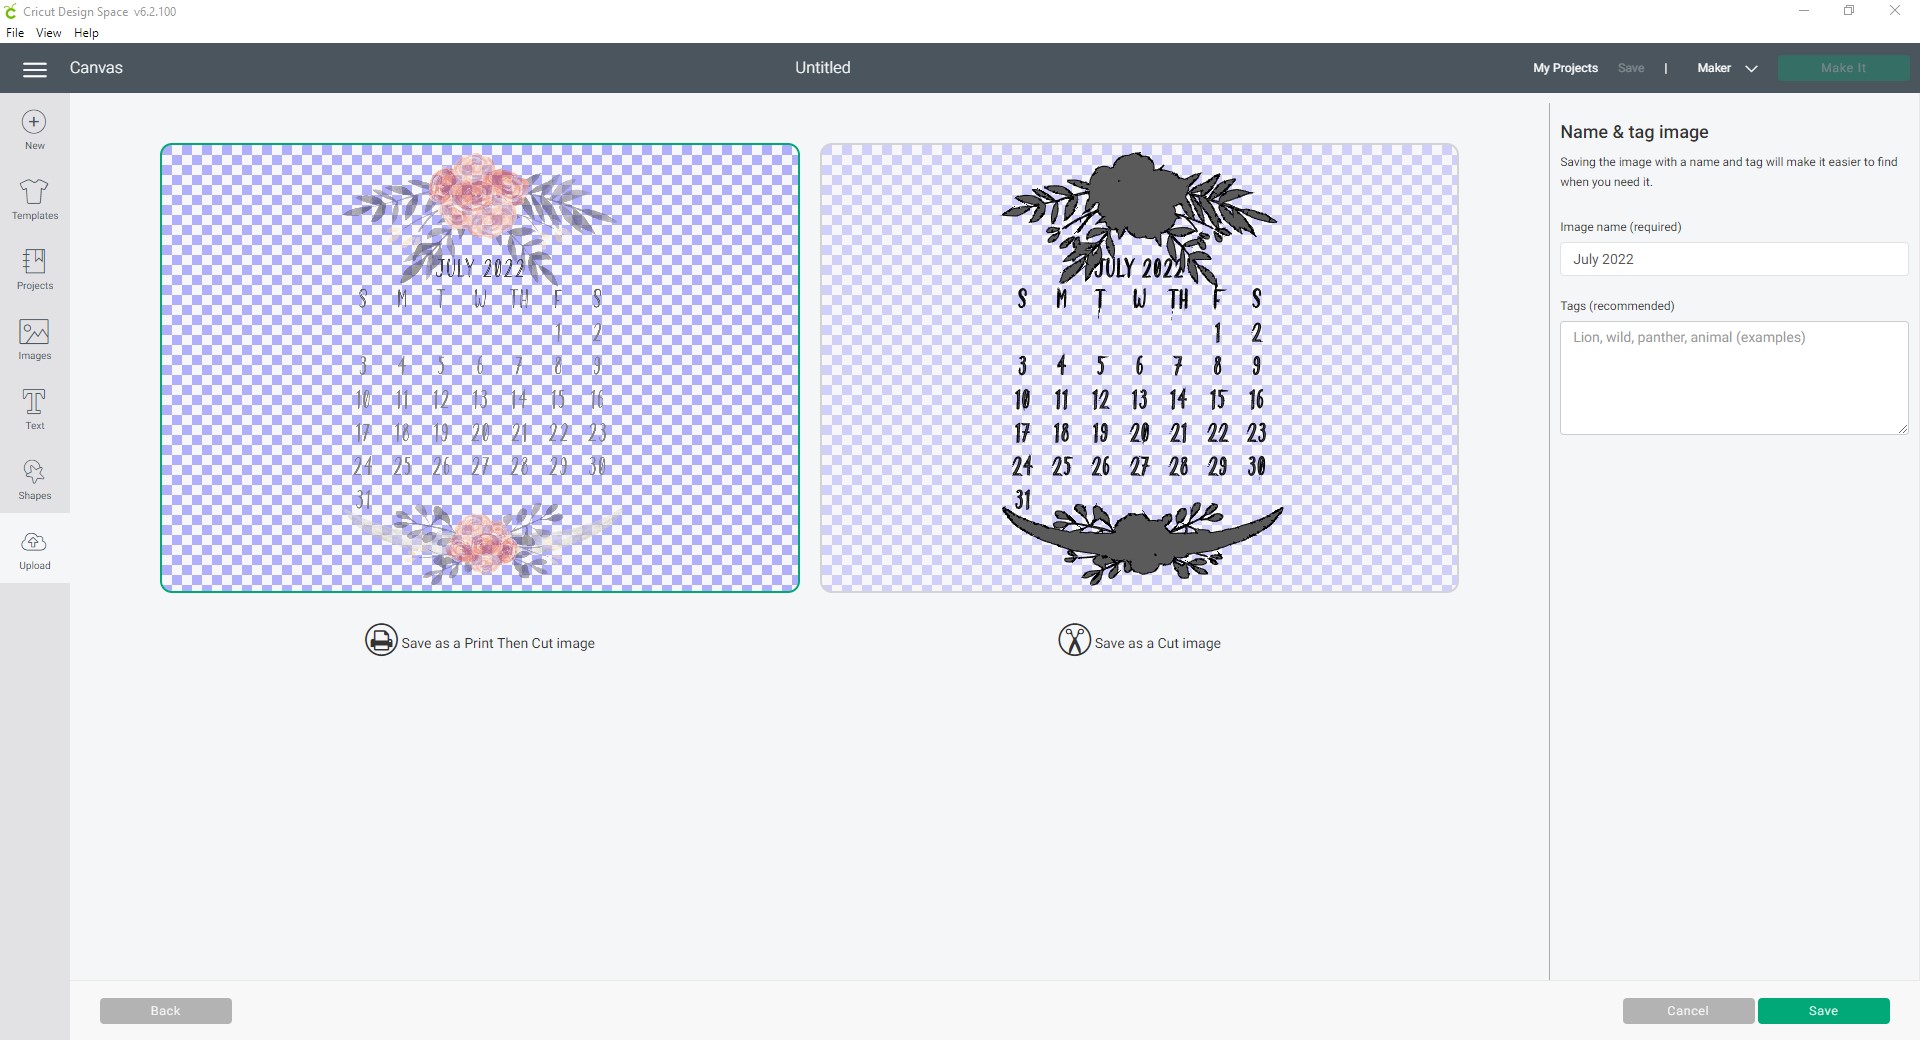
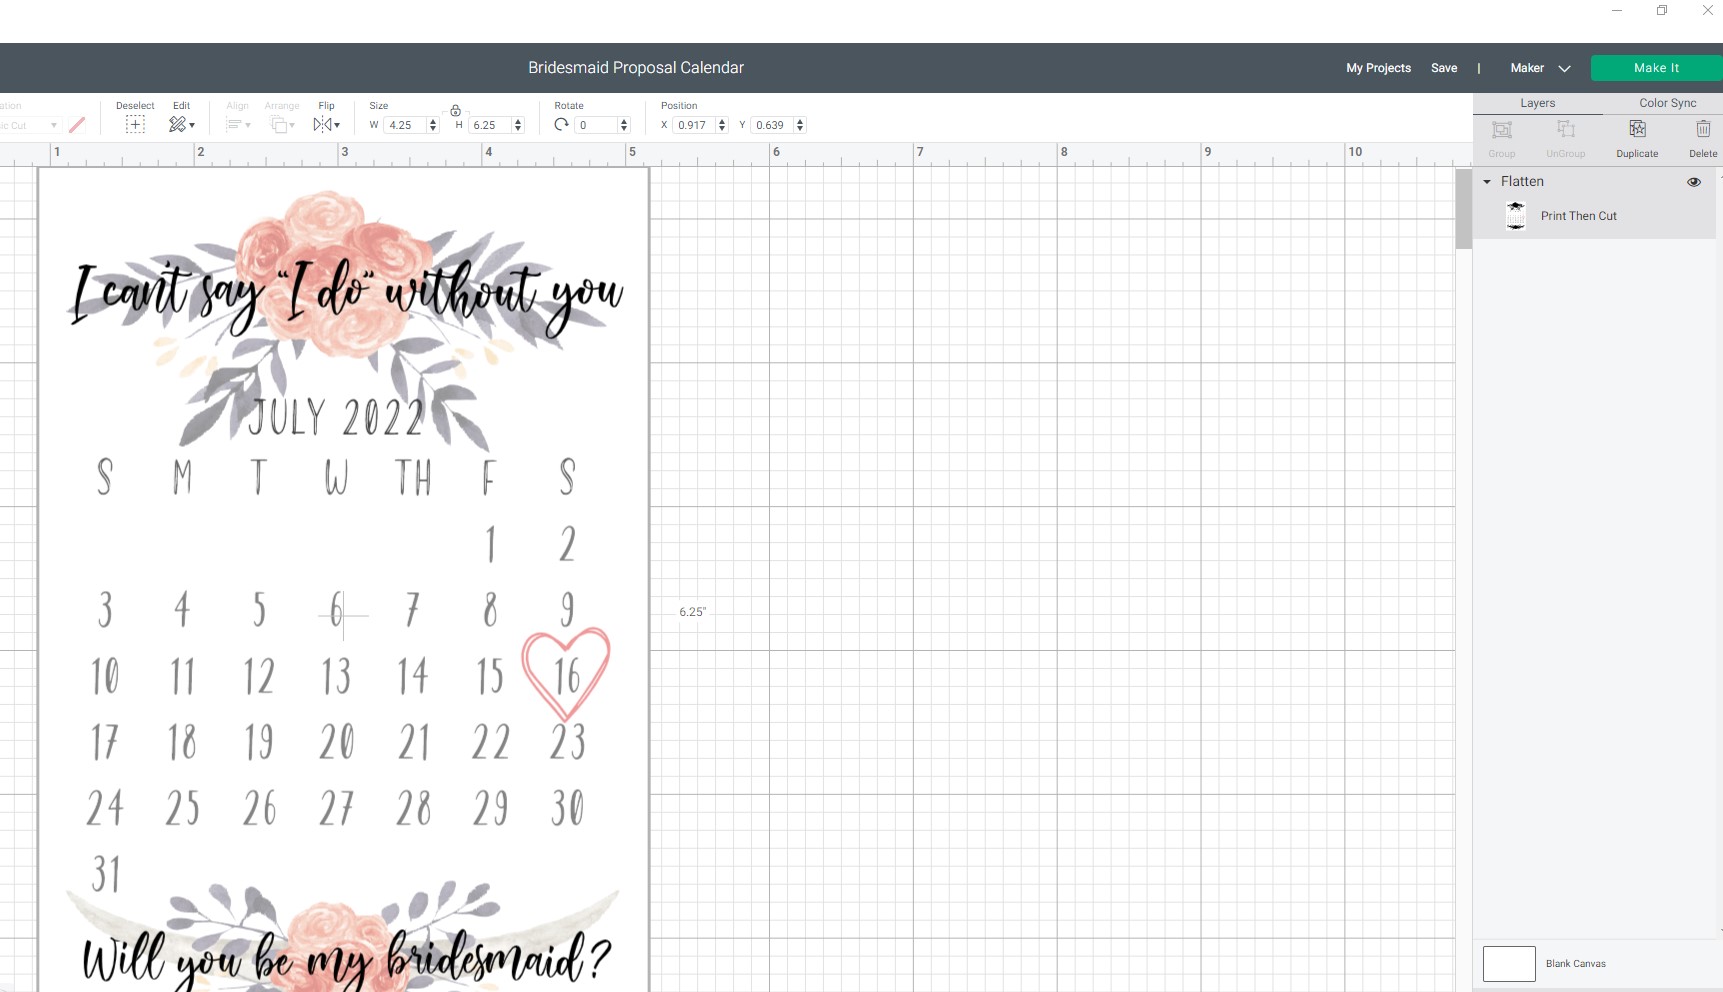
- Upload the calendar design into Cricut Design Space. Save the file as a Print Then Cut image and insert it onto your canvas. Resize to 4" x 6".

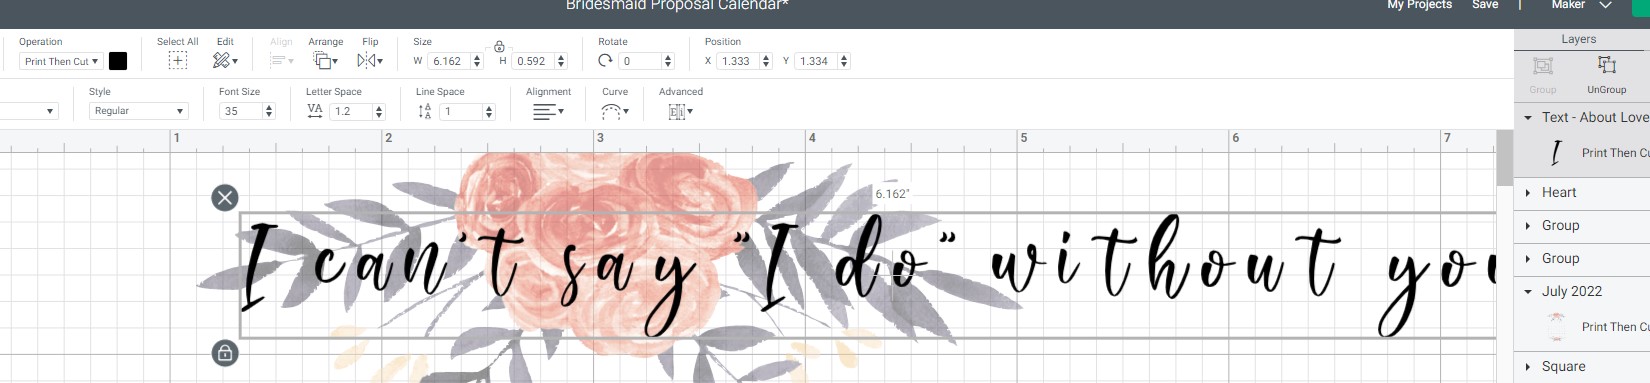
- Add text to the proposal calendar.

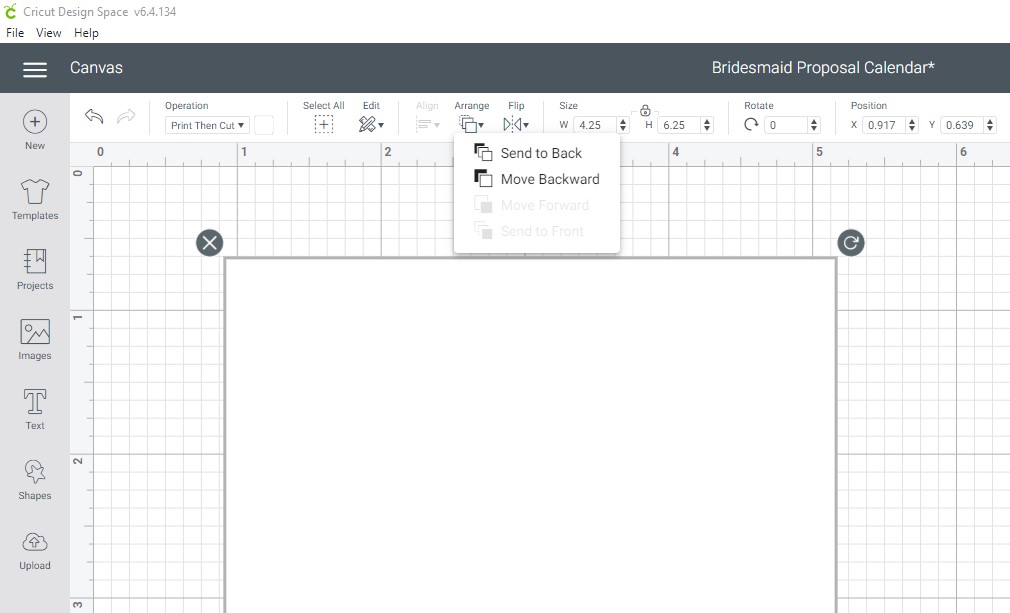
- Make a 4.25" x 6.25" rectangle and select Print Then Cut in the Operation section of the toolbar. Send the rectangle to the back layer.

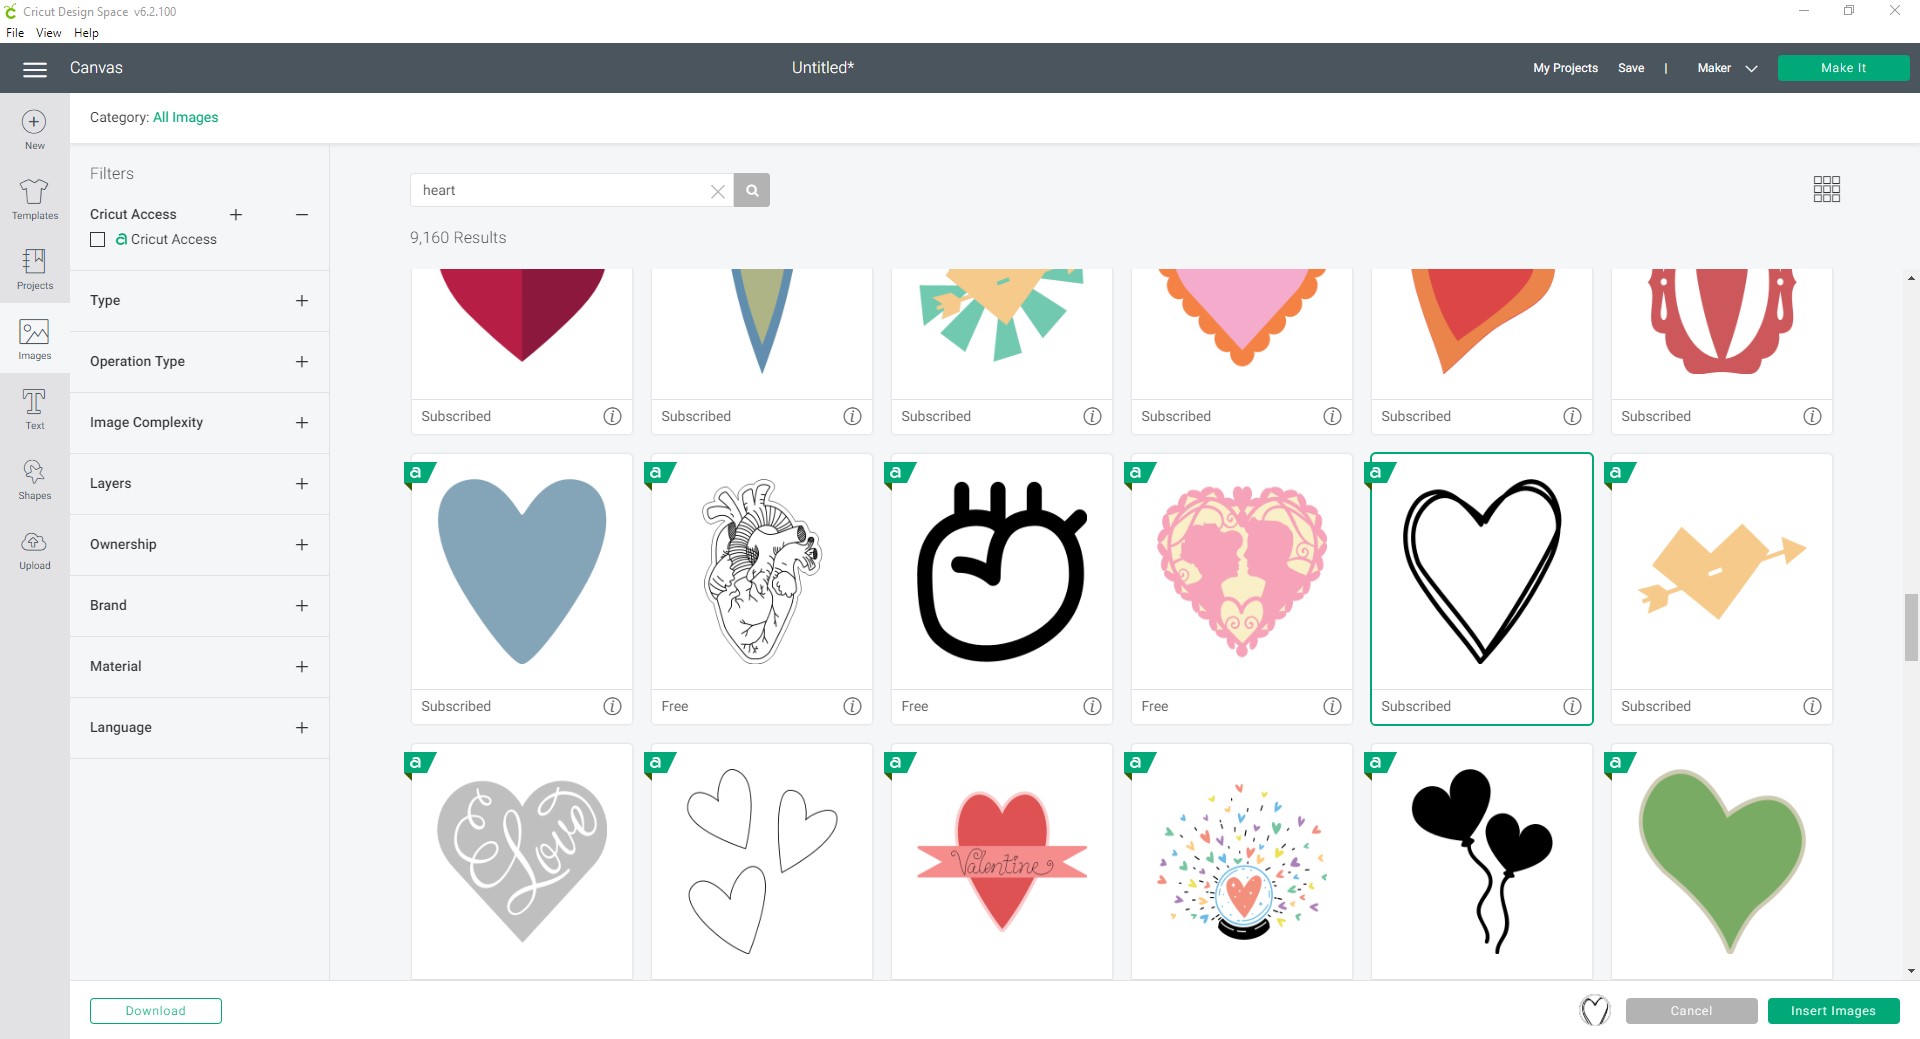
- Add heart shape #MCDD6046 from Cricut Access to your canvas and highlight your wedding date. Change the color to match your proposal card and choose Print Then Cut from the Operation section of the toolbar.

- Select all layers and press flatten from the lower right corner of Cricut Design Space.

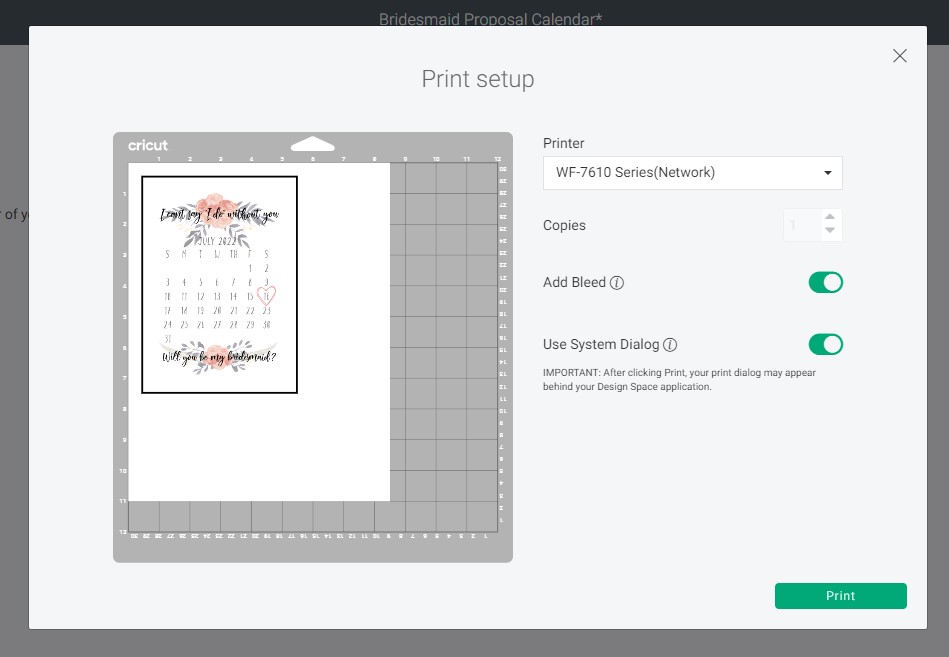
- Print the Bridesmaid Proposal Calendar on 65 lb cardstock. Press "Make It" from the top right corner of Cricut Design Space. Follow the prompts to print the card.

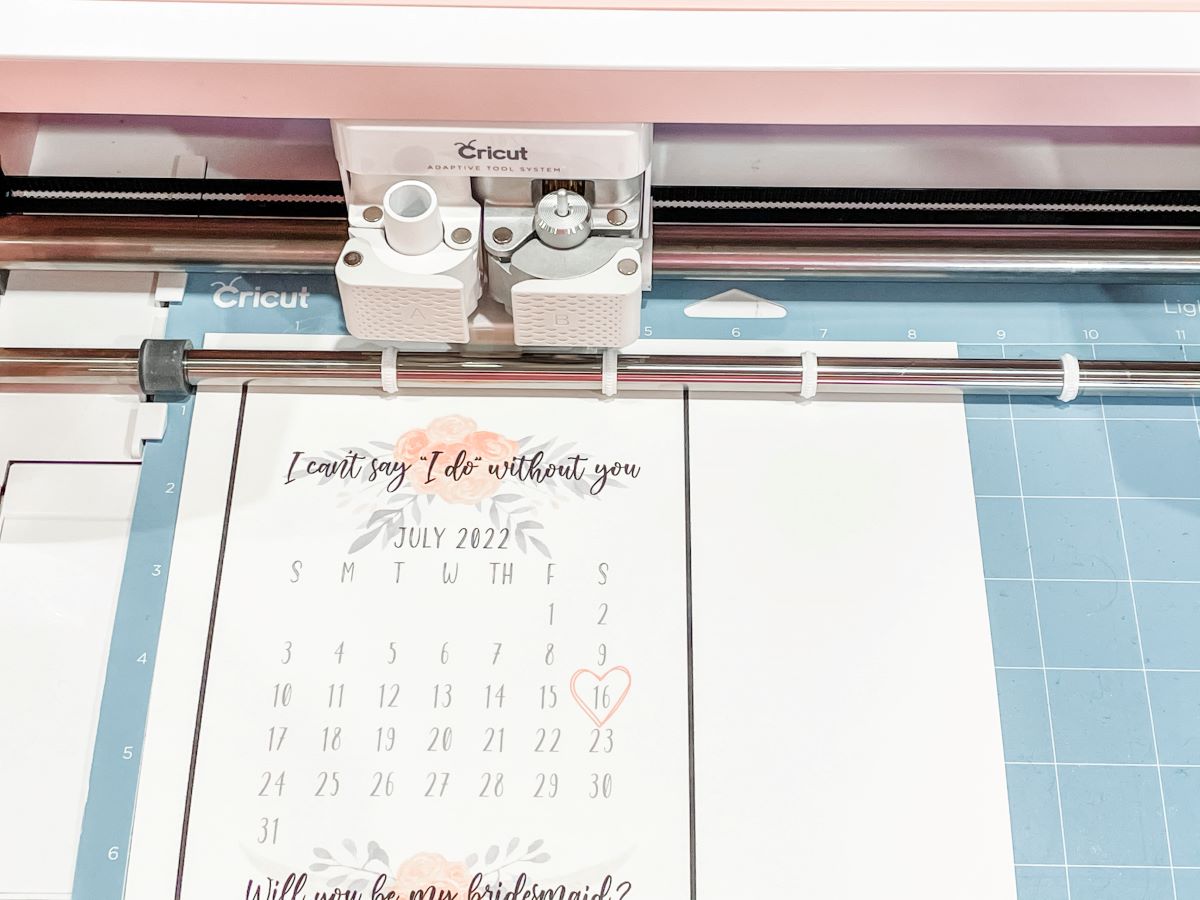
- Cut the card with your Cricut Maker. Load the LightGrip cutting mat with the cardstock. Follow the prompts from Cricut Design Space. Press Go on your machine.

- Unload the cutting mat and remove the cardstock from your cutting mat.