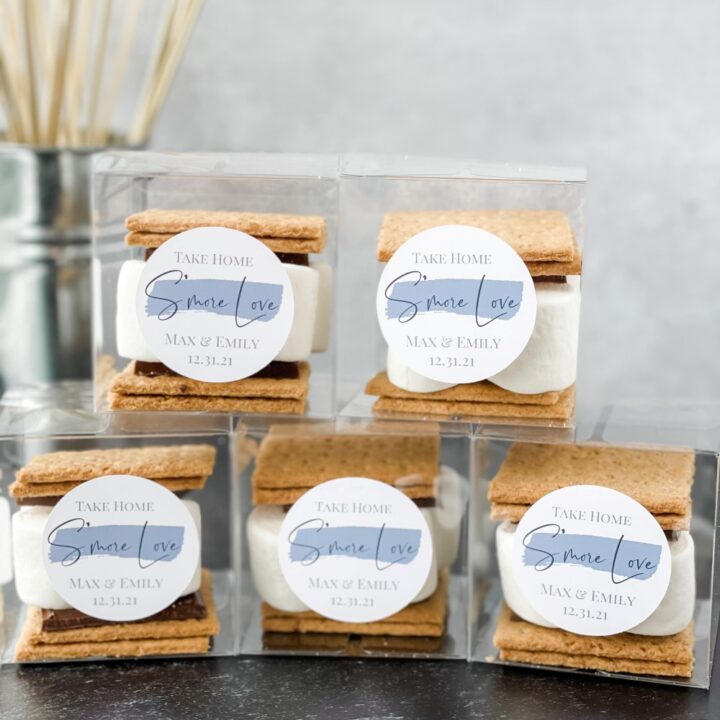
Easy DIY S'mores Wedding Favors
I love the idea of s'mores wedding favors because they are easy to make, and everyone loves them! Plus, it is such a fun and interactive way to incorporate dessert into your reception. The delicious combination of graham crackers, chocolate, and marshmallows is an absolute must for a wedding. An added bonus is that you can use s'mores wedding favors with any wedding type - be it casual, elegant, or formal.
In this post, I will show you how to make s'mores wedding favors using a Cricut cutting machine. This project uses the print-then-cut feature. First, head over to the design file library to get your free project files including a "take home s'more love" svg file! If you still need the password to the design file library you can snag one here.
This post includes some affiliate links for your convenience. This means that if you make a purchase, I earn a small commission at no added cost to you. For more information check out my privacy policy and disclosure.
For inspiration and support, be sure to join our free Facebook community: Cricut DIY Weddings.
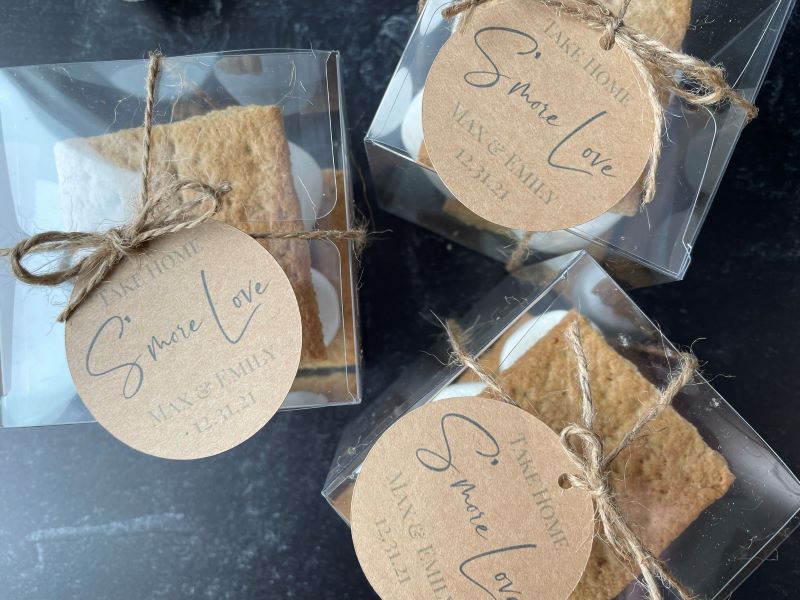
DIY S'mores Wedding Favors
Looking for a fun (and yummy) wedding favor? These s'mores wedding favors are really easy to make!
Materials
- S'mores Ingredients (Graham Crackers, Marshmallows, Chocolate)
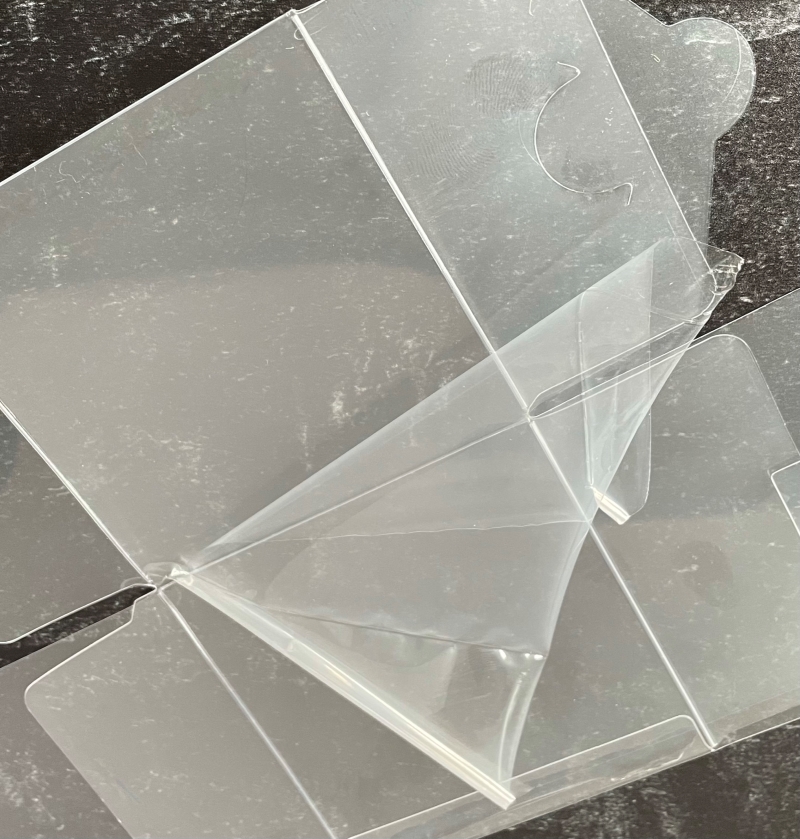
- Clear Boxes (3 inch by 3 inch)
- Cricut Printable Vinyl
Tools
Instructions
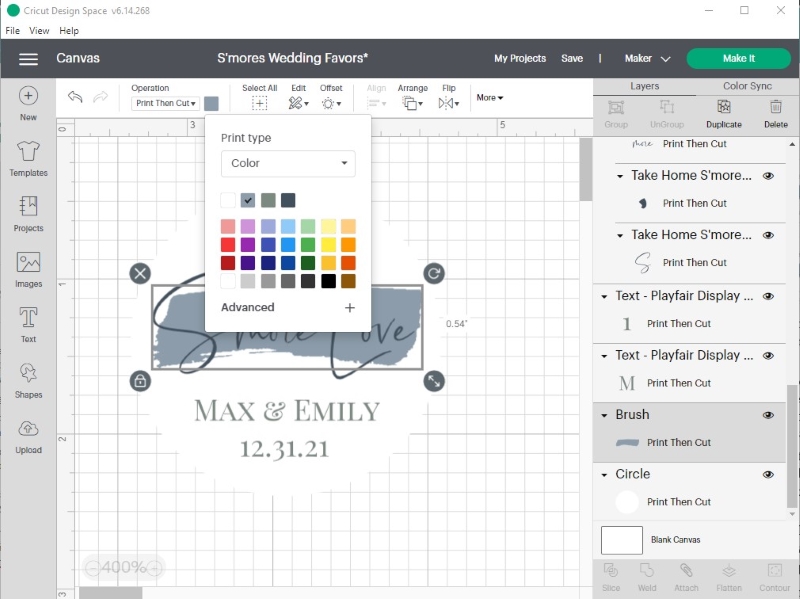
- Download the PDF for the s'mores wedding favor label in our free design file library. If you still need a password, you can get one here. Open the PDF and follow the link to the S'mores Wedding Favors project. Once you've opened the project canvas in Cricut Design Space you'll want to edit the names and the wedding date. I used Playfair Display SC, a free Google font, for the names and wedding date. Feel free to adjust the font to your liking. Edit the colors to match your wedding color palette.

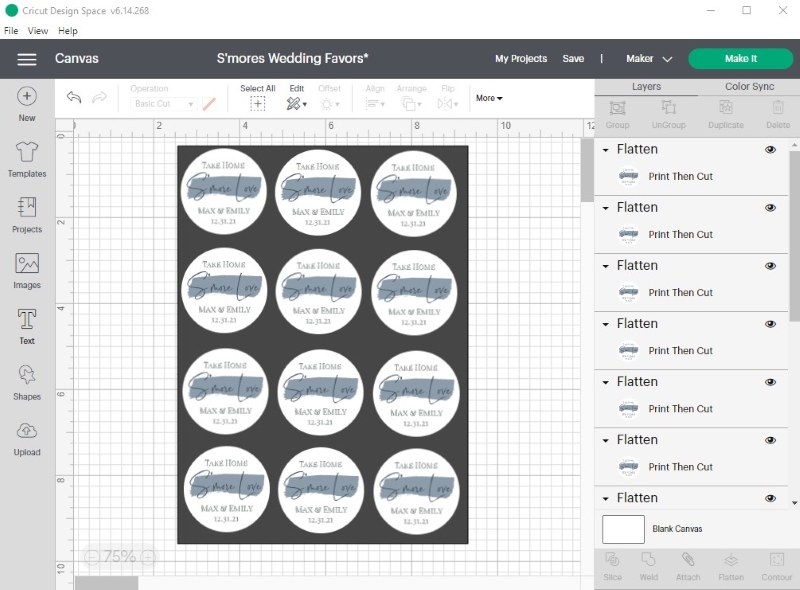
- After making the necessary adjustments to the label, select all and group the circle and text together. Then select flatten. If you skip the flatten step your Cricut will cut out each letter on the tag. To avoid this, flatten all the letters to the circle shape.
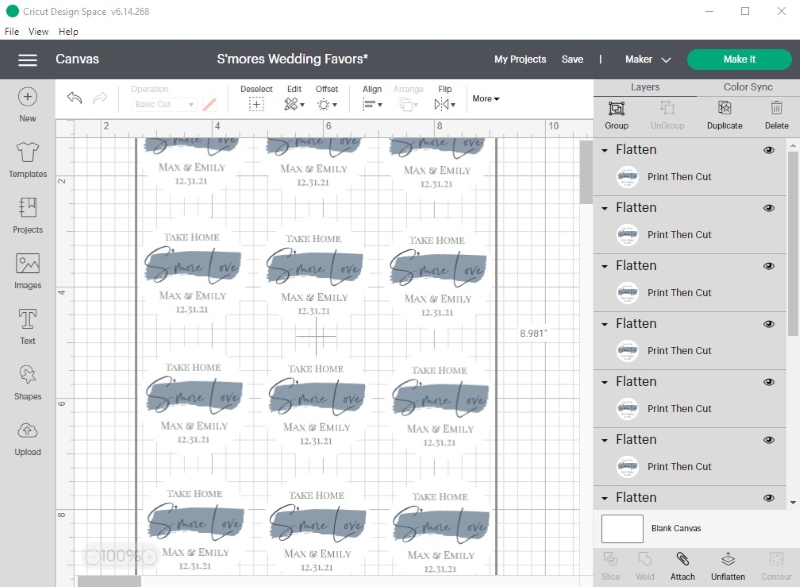
- Add a square shape and adjust the size to 6.75 by 9.25 inches. Send the rectangle to the back. The color of the rectangle doesn't matter. We are just using the rectangle as a guide to fit as many labels on one cutting mat as possible. When using Cricut's print-then-cut feature we are limited to 6.75 inches wide by 9.25 inches long for the total design space. Next, select the grouped and flattened Spread S'more Love label, copy and paste the label until you have filled the rectangle. Arrange the tags so that they are within the boundaries of the rectangle you created.

- Now select the rectangle and delete it. Select all and then attach the labels to the canvas.

- Turn on the power to your Cricut cutting machine and then select make it in Cricut Design Space. Select the material type. Print as many copies as are necessary for your s'mores wedding favors.
- Load printable vinyl into your printer and follow the prompts in Cricut Design Space. After you have printed each page of labels, place a sheet of labels on a LightGrip cutting mat. Be sure the fine-point blade is securely placed in Clamp B. Load the mat and press Go. Repeat this step for each sheet of printable vinyl that you printed.
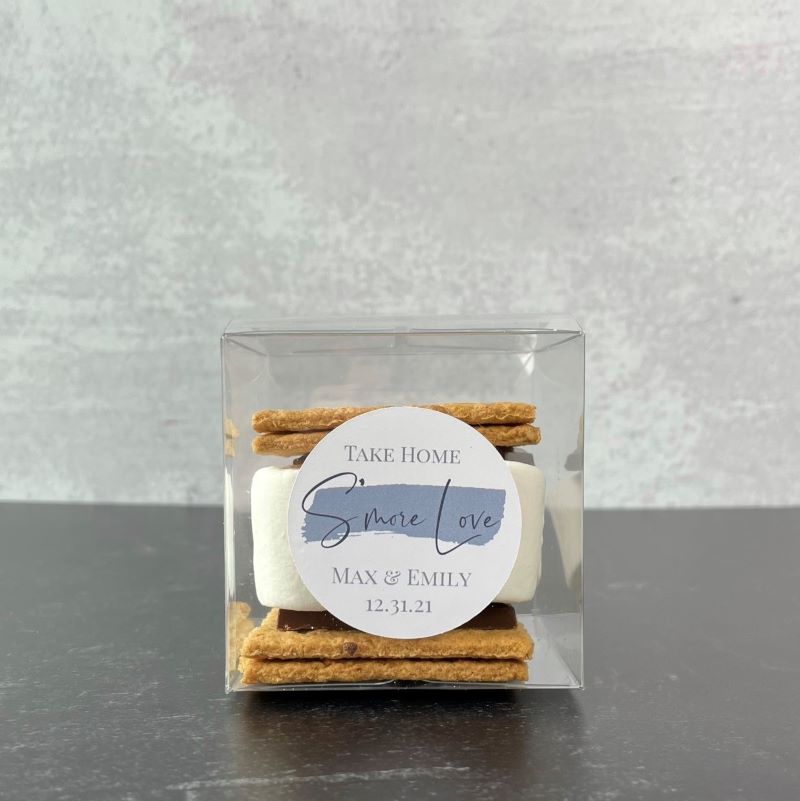
- Now that you've printed and cut the labels, it is time to assemble the clear boxes and fill them with s'mores ingredients. If you purchased the clear boxes from the link I provided, the boxes will come covered with a protective film. You will want to remove this before putting the boxes together.

- Next, fill the boxes with graham crackers, chocolate, and marshmallow. In the boxes I used, there is space for enough ingredients for two s'mores treats. After filling, close the boxes and place your label on the front of the boxes.

- For a more rustic look, make this project with kraft cardstock rather than printable vinyl. Add a small circle large enough for ribbon or twine and attach to the s'mores wedding favors boxes like a gift tag.

Notes
The design files included in this project are for personal use only. To use the template in a commercial project, please reach out to [email protected].