Stunning DIY Necklace Tutorial
In this post, we will show you how to make a DIY personalized necklace using a Cricut Maker. Whether you're looking to make a gift for your bridal party, best friend, or your future MIL, this project is sure to make her smile.
This post includes some affiliate links for your convenience. This means that if you make a purchase, I earn a small commission at no added cost to you. For more information check out my privacy policy and disclosure.
DIY Necklace Tools and Materials
Before we get started, let's go over the tools and materials needed for this project.
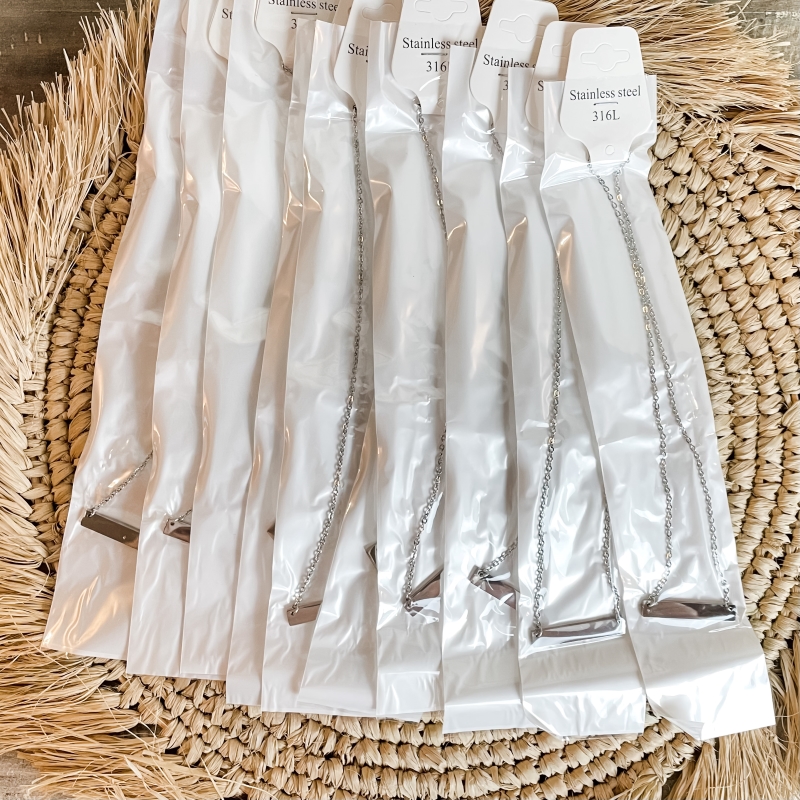
- Stainless steel necklace blanks
- Needle nose pliers
- Painter's tape or masking tape
- Strong grip cutting mat
- Cricut Maker
- Engraving tip and Quick-Swap Housing unit
This project uses the engraving tip that goes with the quick-swap housing tool. If you aren't familiar with how to engrave with your Cricut Maker, read our article on Using the Cricut Engraving Tool.
We found these adorable stainless steel bar necklace blanks on Etsy. They are super affordable (at the time of this post, we scored ten necklaces for $16), arrived quickly, and engraved well.
How to Make a Necklace With a Cricut
This DIY necklace tutorial is perfect if you're looking to make a gift for your best friend, bridal party, or future mother-in-law. You can customize the design and writing to suit any celebration.
Materials
Tools
- Cricut Maker
- Engraving Tip w/ Quick-Swap Housing Tool
- Strong Grip Cutting Mat
- Painter's tape or masking tape
- Needle Nose Pliers
Instructions
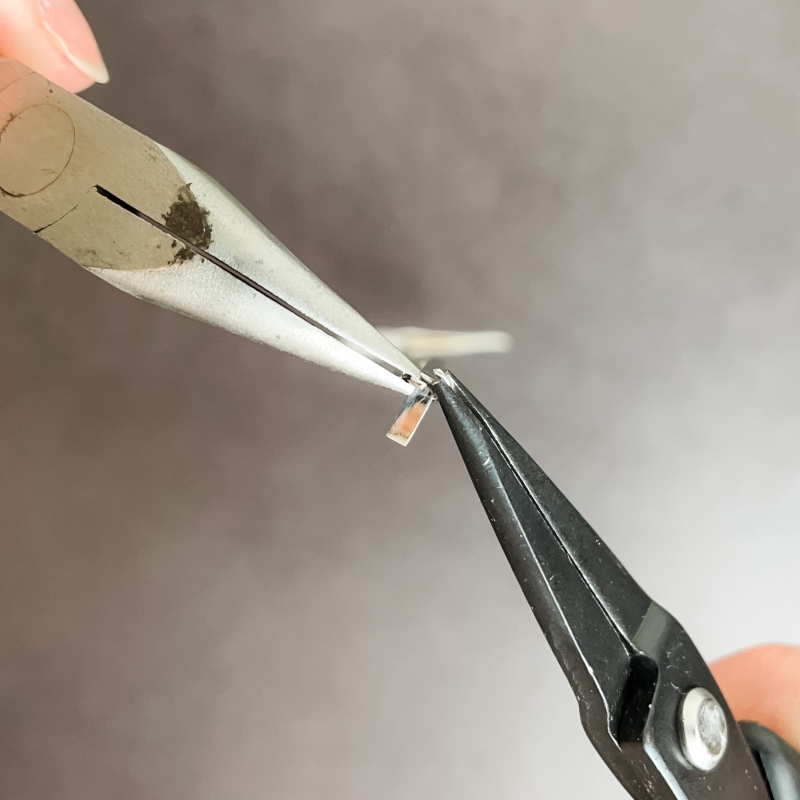
- Remove the blank bar necklaces from their packaging. Then, gently separate the jump rings from both sides of the bar pendant using needle nose pliers.

- Place the bar pendant in the center of your strong grip cutting mat. Add painters or masking tape to the sides of the bar pendant. This ensures the pendant will not move during the engraving process.
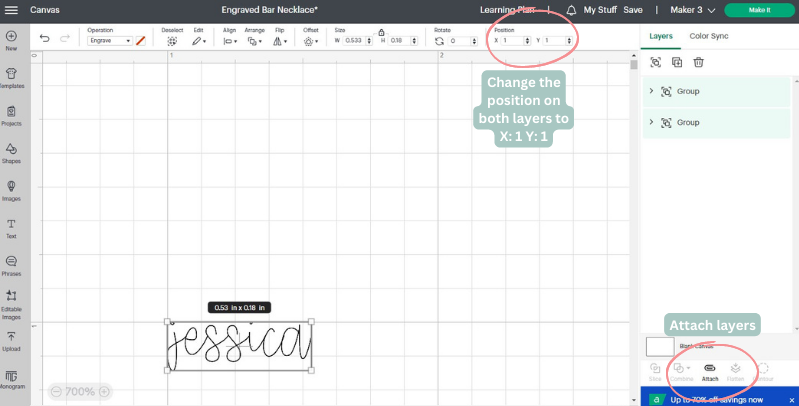
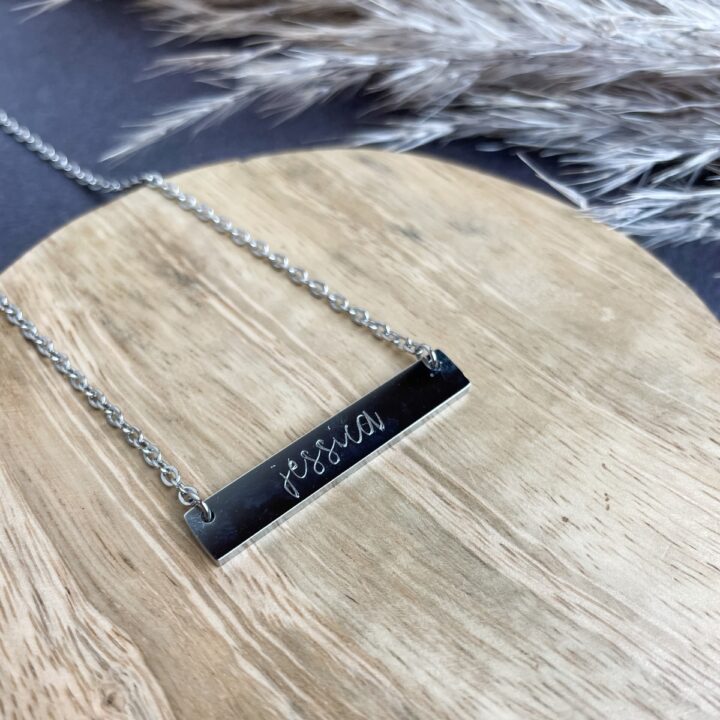
- Design your lettering or decorative elements in Cricut Design Space. Change the operation type to engrave. Be sure to use single-line fonts when creating text.
- Duplicate your design and place the second design directly over the top of the first layer. With this project, I found that by duplicating the design and layering it on top of the first design, the engraving showed up better on the necklace.

Note: to make sure both layers are perfectly overlapping, change the position of both to X: 1 Y: 1.
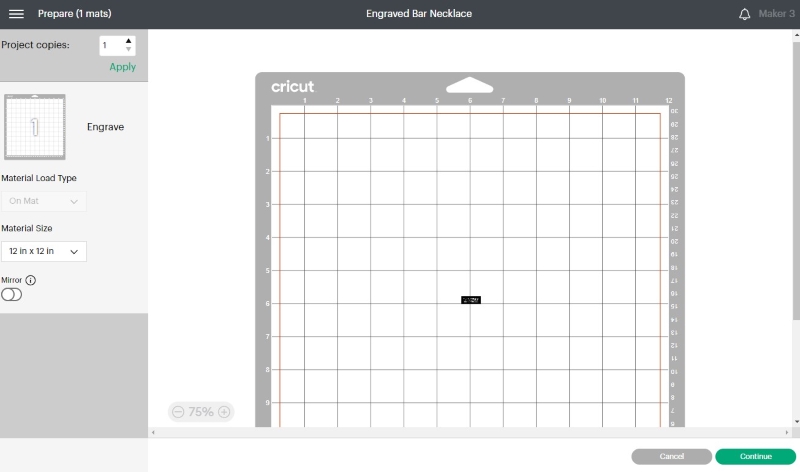
Select both layers and then select attach. - Turn on your Cricut Maker and then select make it in Design Space. Drag the design to the middle of the virtual cutting mat. Zoom in to ensure that your design will engrave in the center of the pendant.

- Select stainless steel for the material type and then change the pressure setting to more pressure.

- Load the cutting mat and press play on the Cricut Maker.
Important: make sure your star wheels are all the way to the right of the loading bar. - When the engraving process is finished, remove the pendant from the cutting mat and gently wipe the metal shavings from the pendant using a microfiber cloth.
- Replace the jump rings and secure the chain on the pendant.

- Repeat these steps for the remaining necklaces.