How to Make Your Own Wedding Vow Books
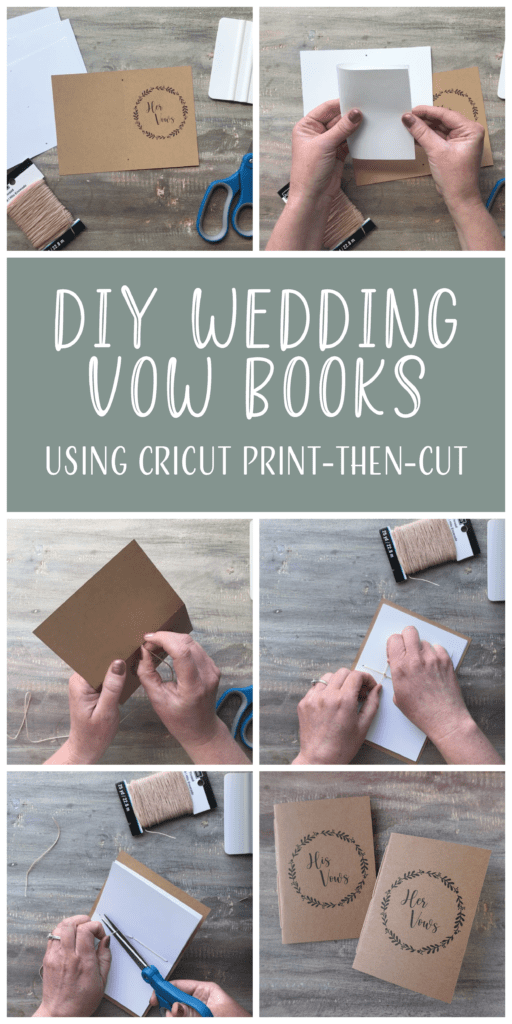
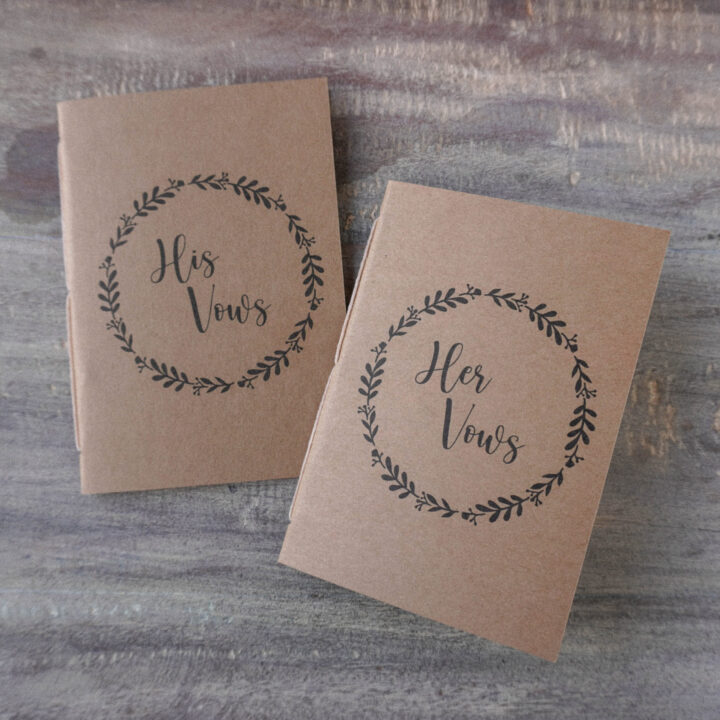
If you and your fiance are planning to write your own vows, these keepsake his and her vow books will add the perfect touch to your ceremony. In this tutorial, I am going to show you how to make your own wedding vow books using a Cricut Maker. This project utilizes the print then cut feature.
This post includes some affiliate links for your convenience. This means that if you make a purchase, I earn a small commission at no added cost to you. For more information check out my privacy policy and disclosure.
Materials Used in This Project
- 2 sheets of 8.5" by 11" kraft cardstock (65 lb)
- 2 sheets of 12" x 12" white cardstock (65 lb)
- Wax thread
- Cricut Maker
- Light grip adhesive cutting mat
- Scoring wheel
- Fine Point Blade
Get Access To Our Free Design File Library
Step 1: Open Cricut Design Space and select the Vow Book Template - Cover project
Once you've selected the project, press customize. You'll notice the project includes a cut for the card, three holes for the thread, and a score line. I really like having the Cricut cut the holes for the thread. I've seen people use staples or a needle to attach the pages to the cover. For me, the symmetrical circles add a nice, clean touch.

Next, upload the Her Vows PNG file and save it as a print then cut file. Once you've uploaded the file, select the file and insert into your project. Drag the file onto the cover of the vow book.
This next step is very important when using the print then cut feature. You want to select the rectangle and the image and press flatten. This will ensure that your Cricut Maker knows to print the image but only cut the rectangle. If you skip this step, your Cricut will add an outline to your image and cut the wreath and letters.

Now press control-a or command-a for a Mac and then select "attach." Your project is now ready to send to your Cricut.
For inspiration and support, be sure to join our free Facebook community: Cricut DIY Weddings.
Step 2: Send your project to your printer
After you've selected "make it" the next step is to print the file. You'll need to do this through the Cricut Design Space prompts.

As you can see, Design Space has added a black rectangle around the design. Don't worry, this will not show once you've completed the project.
Follow the steps to send the file to your printer. Load the kraft cardstock into your printer. Be sure to adjust the printer settings to heavy card stock. Once the file has printed, place the paper onto the light grip cutting mat and follow the steps in Design Space.
Repeat steps one and two for the second vow book cover.
Step 3: Cut the interior pages
Still using Cricut Design Space, open the Vow Book Template - Interior Pages project. Select customize. This project will use one 12" by 12" white card stock paper to cut three interior pages. You'll need to do this twice to have enough pages for both vow books.
Make sure to select all and press attach before choosing "make it."
Follow the directions in Design Space to cut the interior pages.
Step 4: Assemble the wedding vow books


Hooray! Your Cricut has finished the magic, and now it is time for you to assemble the vow books.
Using the score line as your guide, fold the covers and the inside pages.
Grab three inside pages and align the pre-cut holes. Then do the same for the cover.

Now, cut about 24 inches of your waxed thread and begin to thread through the holes. I like to start in the middle. Once you've completed threading the book, tie a little not and cut off the excess thread.

Don't you just love waxed thread? It makes tying the knot so much easier.
Repeat this process for the second vow book and you are done!
Now you've made your own wedding vow books that will serve as a great keepsake. You can even customize the cover and use the same templates to give to your maid of honor and best man for their speech.
How to Make Wedding Vow Books
Learn how to make wedding vow books with a Cricut using out step-by-step tutorial.
Materials
Instructions
- Download the project design file from our free design file library

- Open the Vow Book Template Cover Project in Cricut Design Space. Once you've selected the project, press customize. You'll notice the project includes a cut for the card, three holes for the thread, and a score line. I really like having the Cricut cut the holes for the thread. I've seen people use staples or a needle to attach the pages to the cover. For me, the symmetrical circles add a nice, clean touch.

- Next, upload the Her Vows PNG file and save it as a print then cut file. Once you've uploaded the file, select the file and insert into your project. Drag the file onto the cover of the vow book.
This next step is very important when using the print then cut feature. You want to select the rectangle and the image and press flatten. This will ensure that your Cricut Maker knows to print the image but only cut the rectangle. If you skip this step, your Cricut will add an outline to your image and cut the wreath and letters.
Now press control-a or command-a for a Mac and then select "attach." Your project is now ready to send to your Cricut. - Print the wedding vow book cover. After you've selected "make it" the next step is to print the file. You'll need to do this through the Cricut Design Space prompts.
As you can see, Design Space has added a black rectangle around the design. Don't worry, this will not show once you've completed the project.
Follow the steps to send the file to your printer. Load the kraft cardstock into your printer. Be sure to adjust the printer settings to heavy card stock. Once the file has printed, place the paper onto the light grip cutting mat and follow the steps in Design Space.
Repeat the steps above for the second vow book cover. - Cut the interior pages. Still using Cricut Design Space, open the Vow Book Template - Interior Pages project. Select customize. This project will use one 12" by 12" white card stock paper to cut three interior pages. You'll need to do this twice to have enough pages for both vow books.
Make sure to select all and press attach before choosing "make it."
Follow the directions in Design Space to cut the interior pages.
- Assemble the wedding vow books. Using the score line as your guide, fold the covers and the inside pages. Grab three inside pages and align the pre-cut holes. Then do the same for the cover.

Now, cut about 24 inches of your waxed thread and begin to thread through the holes. I like to start in the middle. Once you've completed threading the book, tie a little not and cut off the excess thread.