DIY Do Not Disturb Door Hangers for Wedding Guests
LEARN TO MAKE DO NOT DISTURB DOOR HANGERS FOR YOUR OUT OF TOWN WEDDING GUESTS!
These DIY do not disturb door hangers are the perfect addition to your guest welcome bags. You can leave the welcome bags with the hotel front desk to place in guests rooms. This makes guests feel welcomed and part of your big day as soon as they arrive.
This post includes some affiliate links for your convenience. This means that if you make a purchase, I earn a small commission at no added cost to you. For more information check out my privacy policy and disclosure.
Materials Used in This Project
- Free Printable Door Hanger Template
- 65 lb cardstock (I usedRecollections Champagne Shimmer Cardstock)
- Cricut Maker
- Fine Point Blade
- Ink Jet Printer
- LightGrip adhesive cutting mat
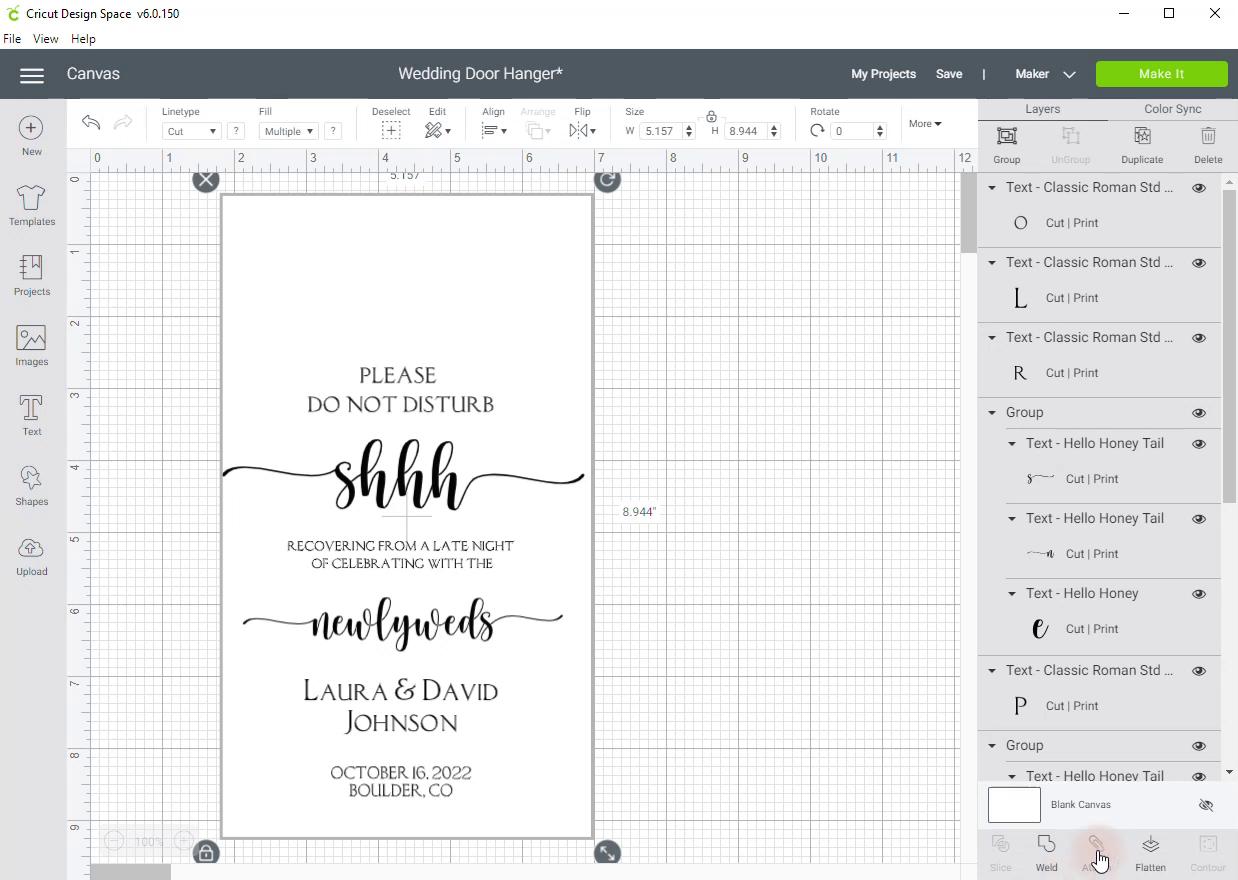
Once you've downloaded the free door hanger template you'll need to open the project in Cricut Design Space. The design file is set up in several layers. I used two fonts in this project, Hello Honey and Classic Roman Standard.
For inspiration and support, be sure to join our free Facebook community: Cricut DIY Weddings.
The file is set up so that the 'shhh' and 'newlyweds' text goes all the way to the edges of the door hanger sign.

The first thing you'll want to do is ungroup the text.

Next, you'll customize the names and wedding detail text.

Then, select all of the text and regroup it together.
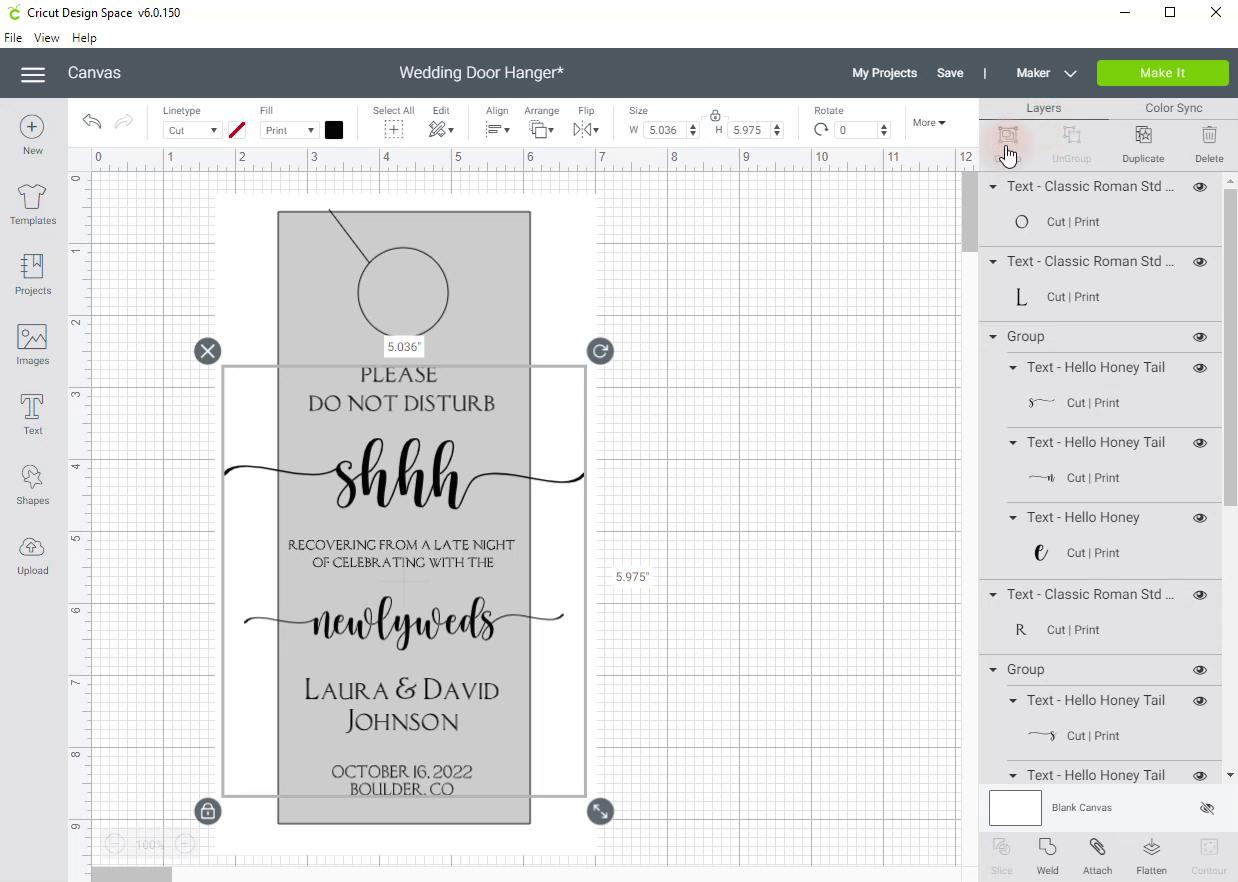
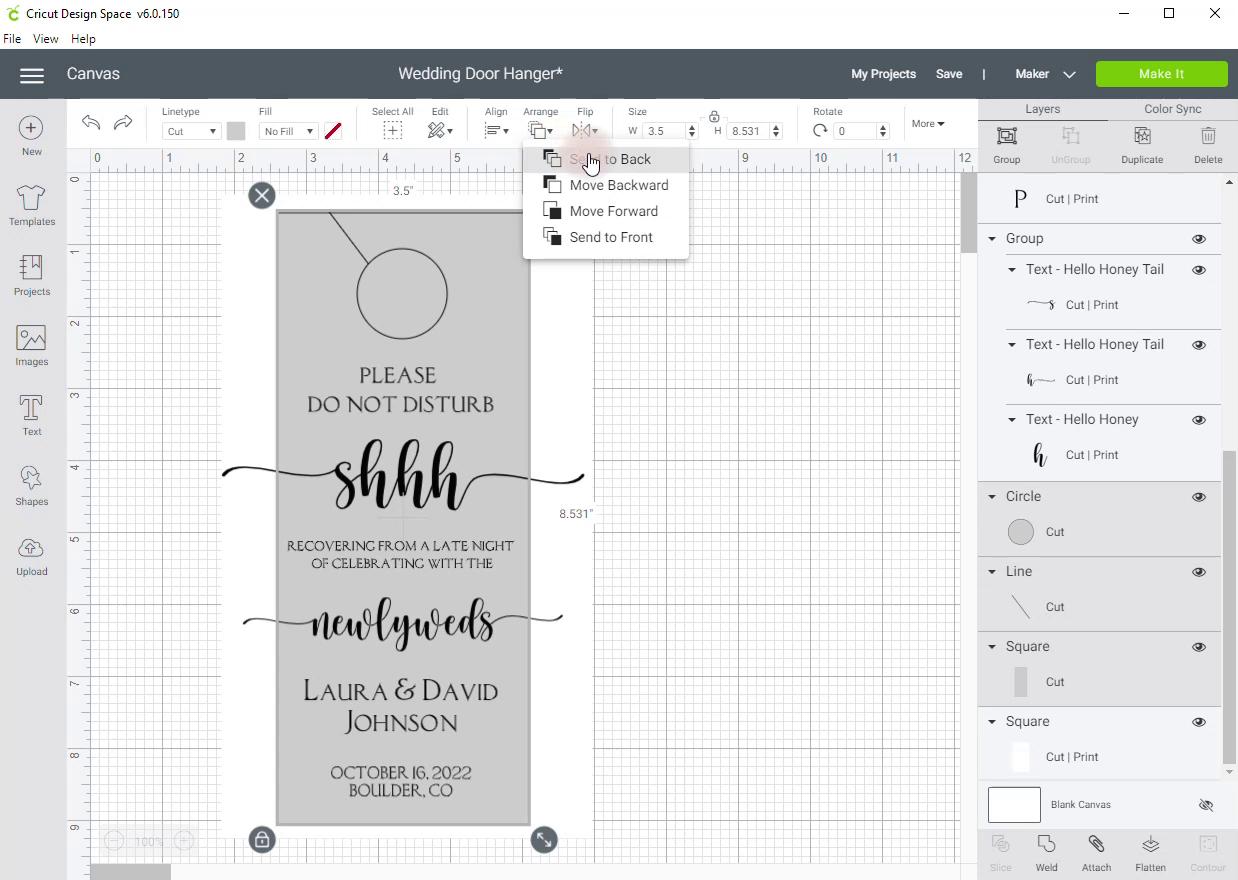
After you've grouped the text select the layers set to cut. This includes the circle, line, and square cut shapes.

Send these to the back. Because this project uses Cricut's print then cut feature, you want to make sure the cut layers are on the bottom. Otherwise, when you go to attach the design it will only show a white rectangle.
If you have never used the print then cut feature, I recommend viewing my tutorial for DIY wedding vow books. In this video, I walk through how to use this feature in detail.
Do not miss this next step: select the white square Cut | Print shape and all of the text layers. Then select 'Flatten' in the lower right corner of Cricut Design Space.
If you miss this step, when your Cricut Maker starts to cut your file, it will cut each letter out. You don't want that!
Now you'll want to select all of the layers and attach all layers to the mat. This is an important step. If you skip this step, your Cricut Maker will think you want to make each of the grouped layers separately. With this design, everything needs to take place using the same material, a single piece of cardstock.
After you've attached all the layers, select Make It.
Now you are ready to print the design file. To use the print then cut feature for the wedding guest door hanger project, you'll need an inkjet printer.

Once you've printed the design, place the cardstock on the lightgrip cutting mat. Insert the fine blade tool into Clamp B of your Cricut Maker and load the cutting mat. When you are ready, press the Go button.
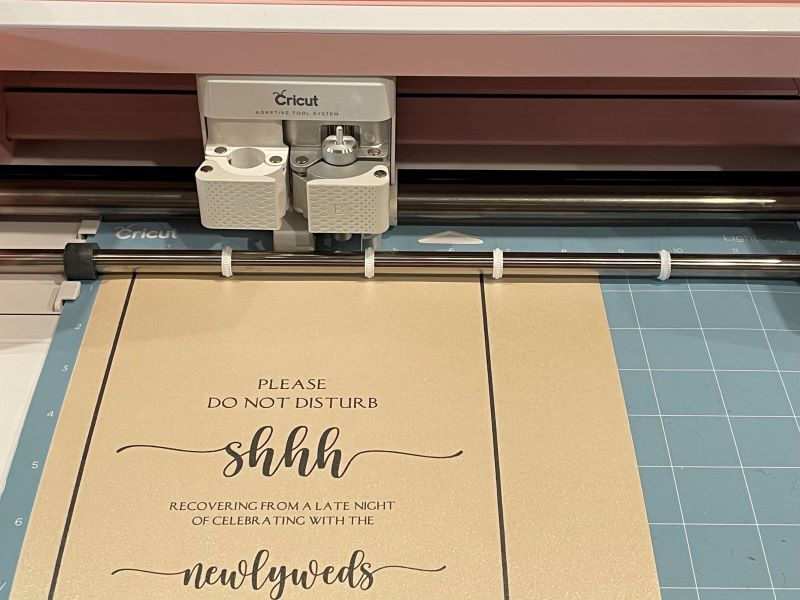 Once the door hanger has been cut by your Cricut Maker, remove the cardstock from the LightGrip cutting mat and you are done!
Tip: you can print several of the door hangers at once to save time! When you send the file to your Cricut Maker, select 'I've already printed.'
Thinking about creating wedding invitations with your Cricut? Be sure to check out our article on single line fonts for Cricut.